树莓派安装 RHEL
This tutorial is originally written in English here
这个想法怎么来的
大概是 鲨了 CentOS 的良心不安,
Red Hat 去年宣布 RHEL 个人订阅白送了 。
也就是现在家用红帽 Linux 不要钱了!
我囸,有 RHEL 用,谁还玩 CentOS?
但是我没机器来玩 (P.S. 写的时候有了嘿嘿),
手头就剩下一块树莓派 4B 🥺
于是开始搜索教程,但 Bing 直接给我当头一棒:
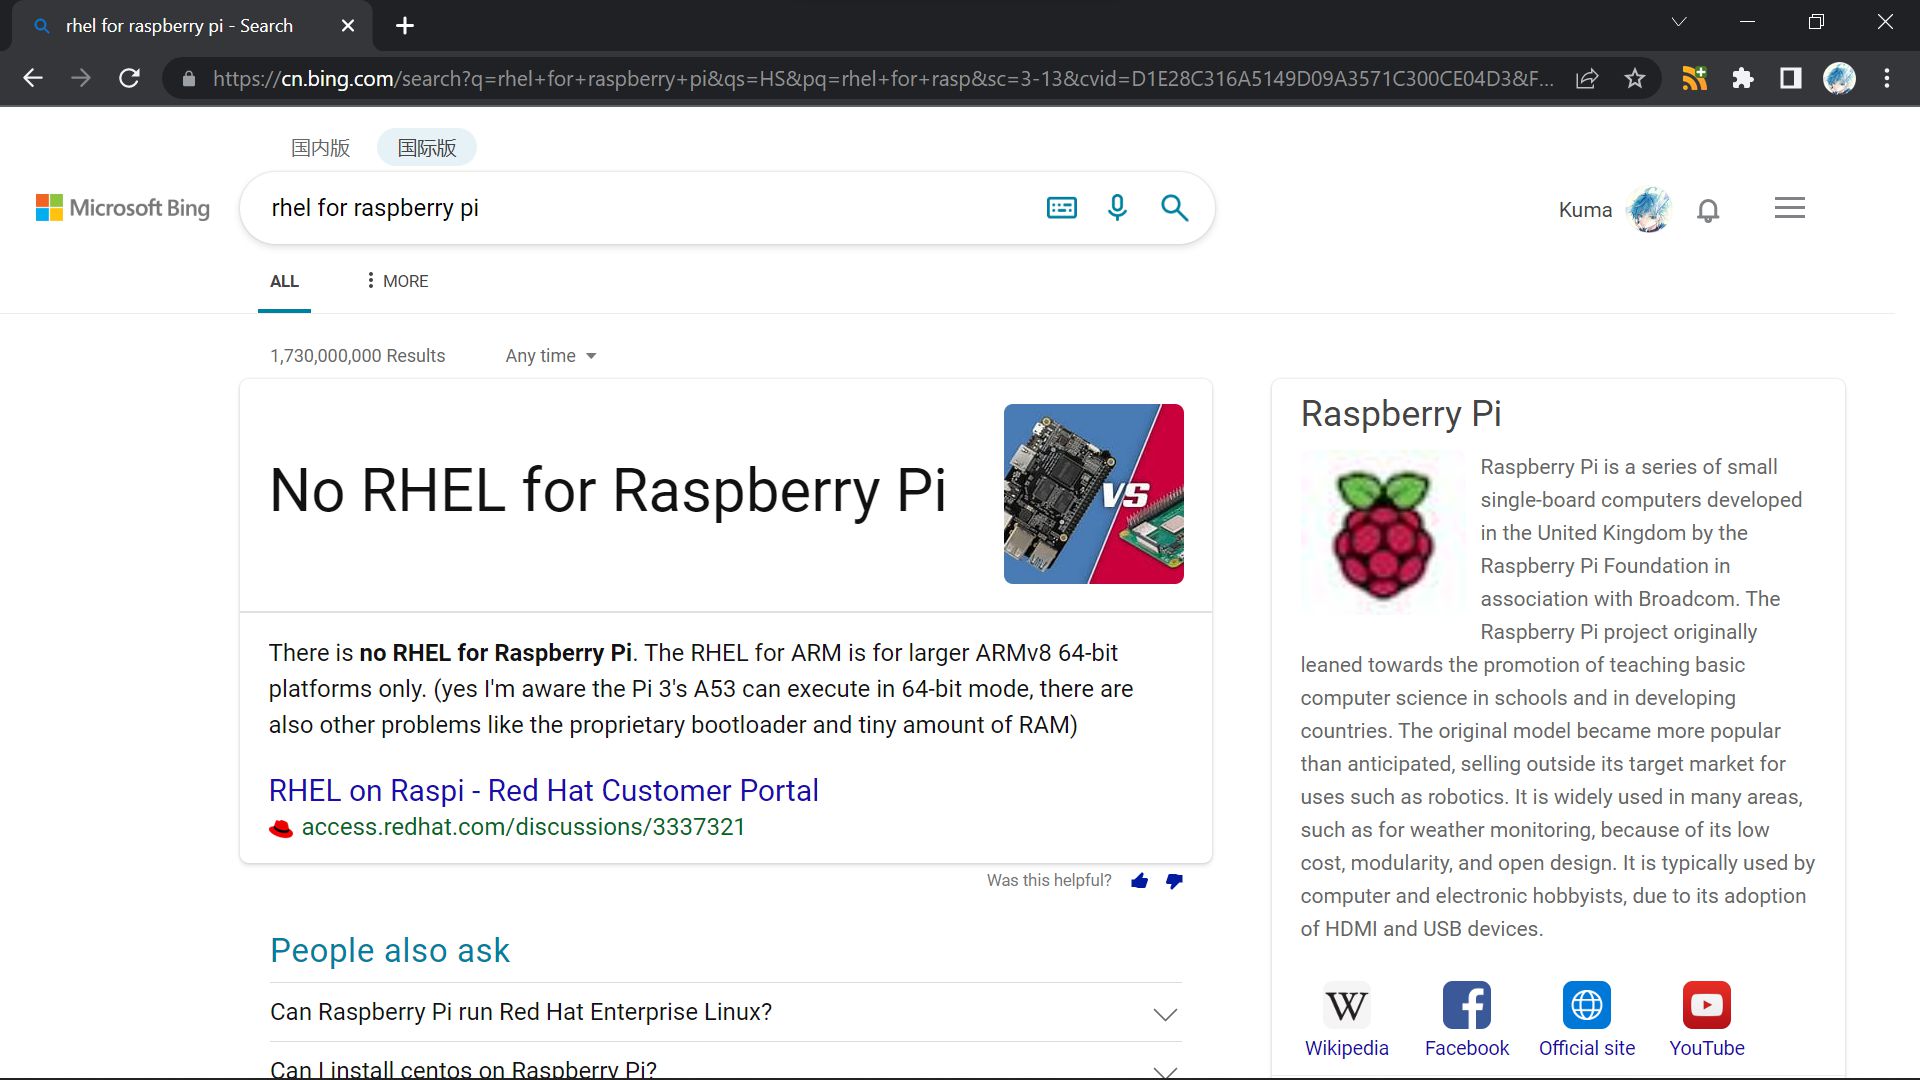
本来准备放弃了, 结果意外发现,
Oracle Linux ,
一个红帽Linux的衍生版本,
(对,就那个拒了我100多次注册云服务的万恶的 Oracle)
有发布 适用于树莓派 4B、400和3B/+ 的固件 耶!
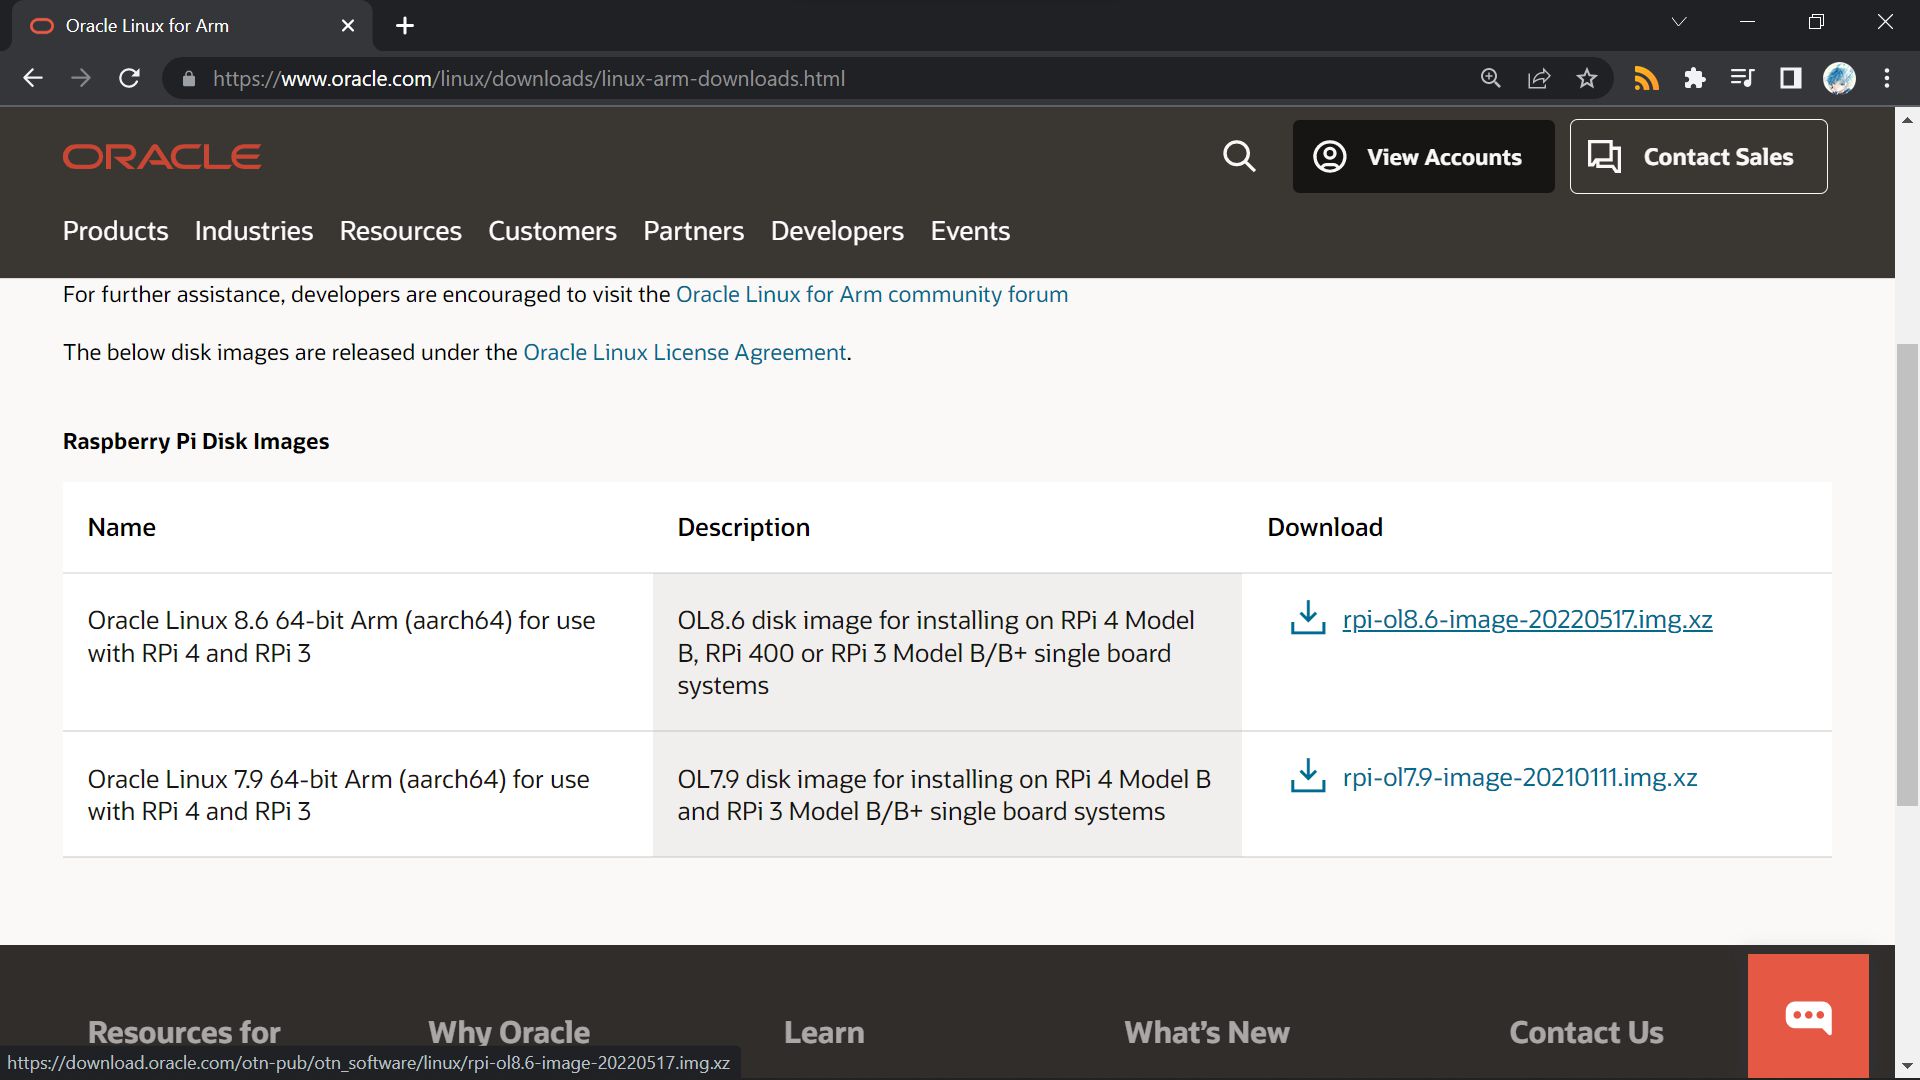
搜了下,大概是唯一支持树莓派的 RHEL 发行版了。
花了几天摸索出一个奇技淫巧,玩一波偷梁换柱,
达到在树莓派上安装 RHEL 的方法,简述一下。
需求
- Raspberry Pi 4B, 400或3B/+
- 一个系统盘
- Red Hat 个人订阅
- 科学或者魔法上网
注册 Red Hat 个人订阅
来这里 注册 Red Hat Individual Subscription 。
注册完了记得看下 你的管理页面 有没有东西:
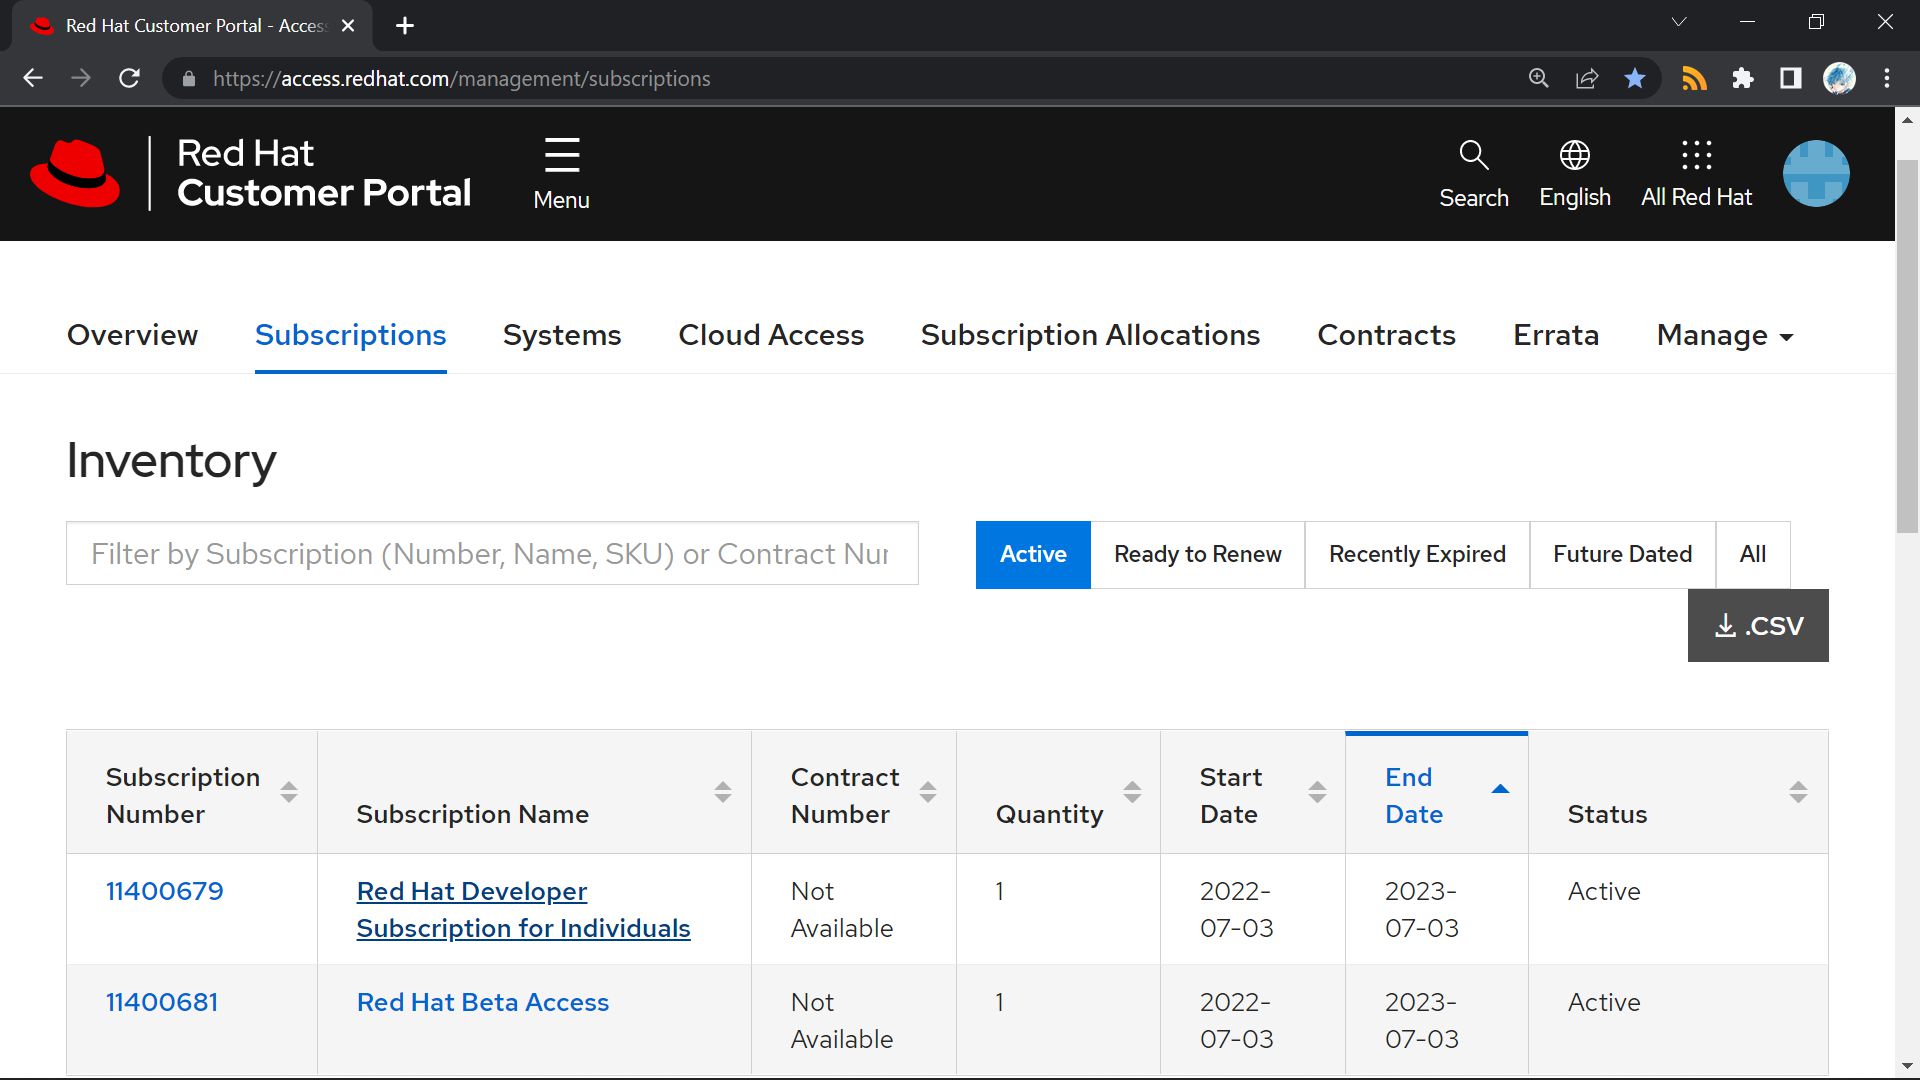
等下要从 RHEL 的 repo 中更新软件包,所以这步不能省。
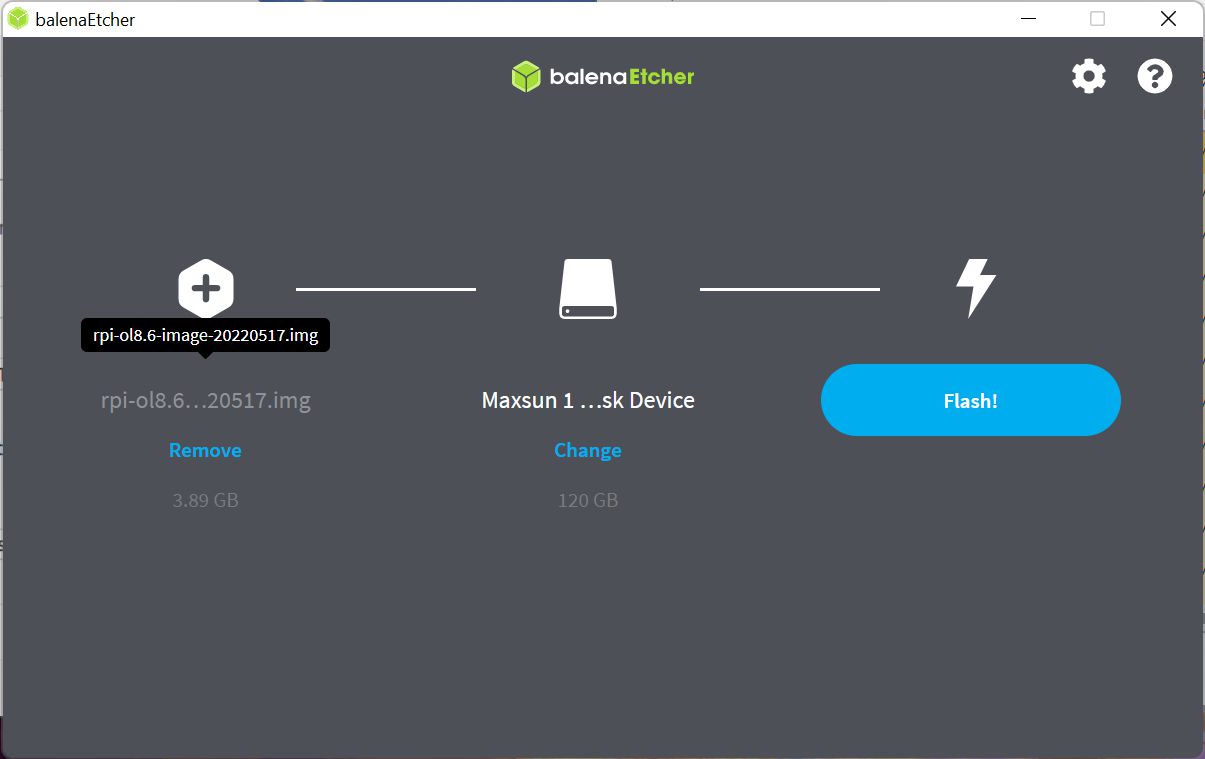
安装 Oracle Linux
首先 下载 Oracle Linux 。
然后找个你喜欢的刷写工具。
一般 Raspberry Pi Imager
就好了,但我更喜欢 Etcher 。
下载的图像压缩成 xz 格式了,但不用解压,直接开刷!
SSD 与 SD卡
Oracle Linux 的根文件系统 (rootfs) 是 btrfs ,
卡得出奇,卡的批爆!合起来写炸了我5个内存卡和U盘!就为了这篇!
所以别用内存卡!用固态!!!
或者可以考虑下换成 f2fs 。
然后接上树莓派,插电,开机!
进入路由的 DHCP 客户端页面,找到 IP 地址,刚出来那个。
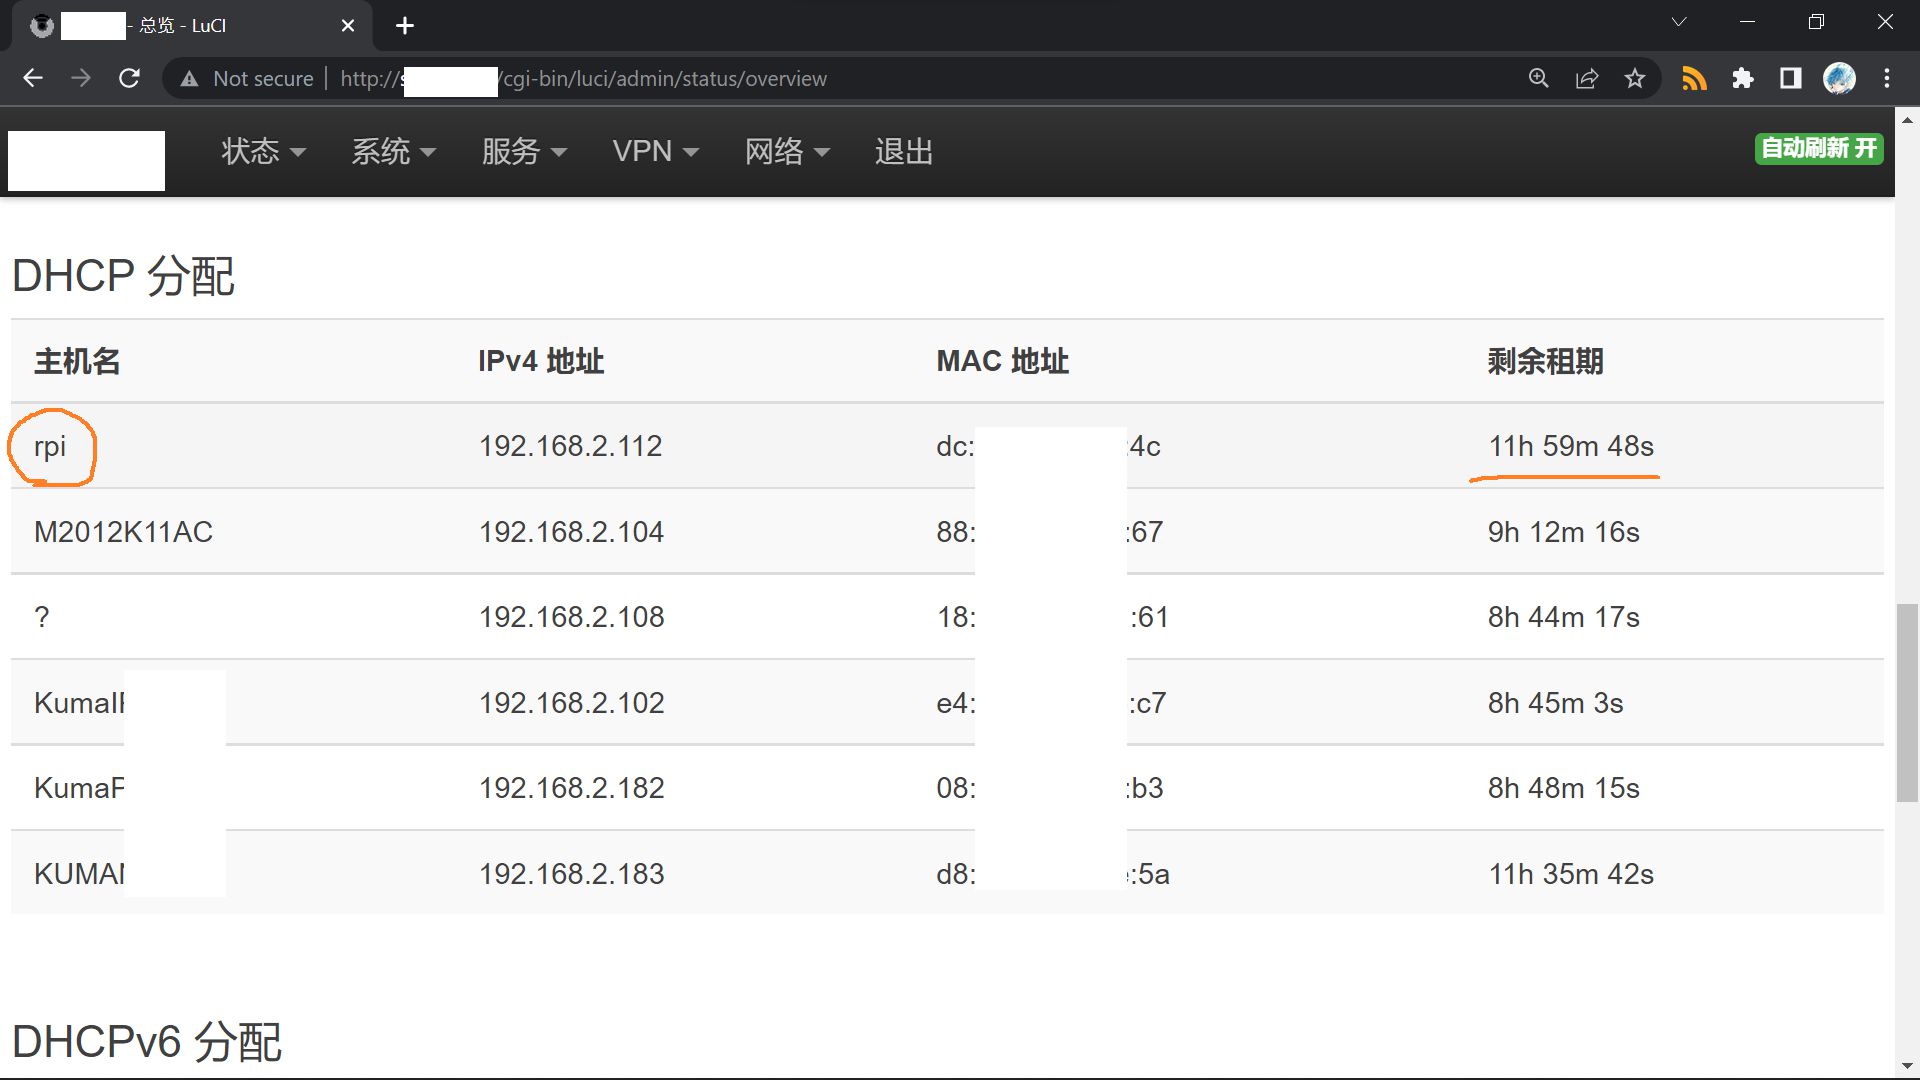
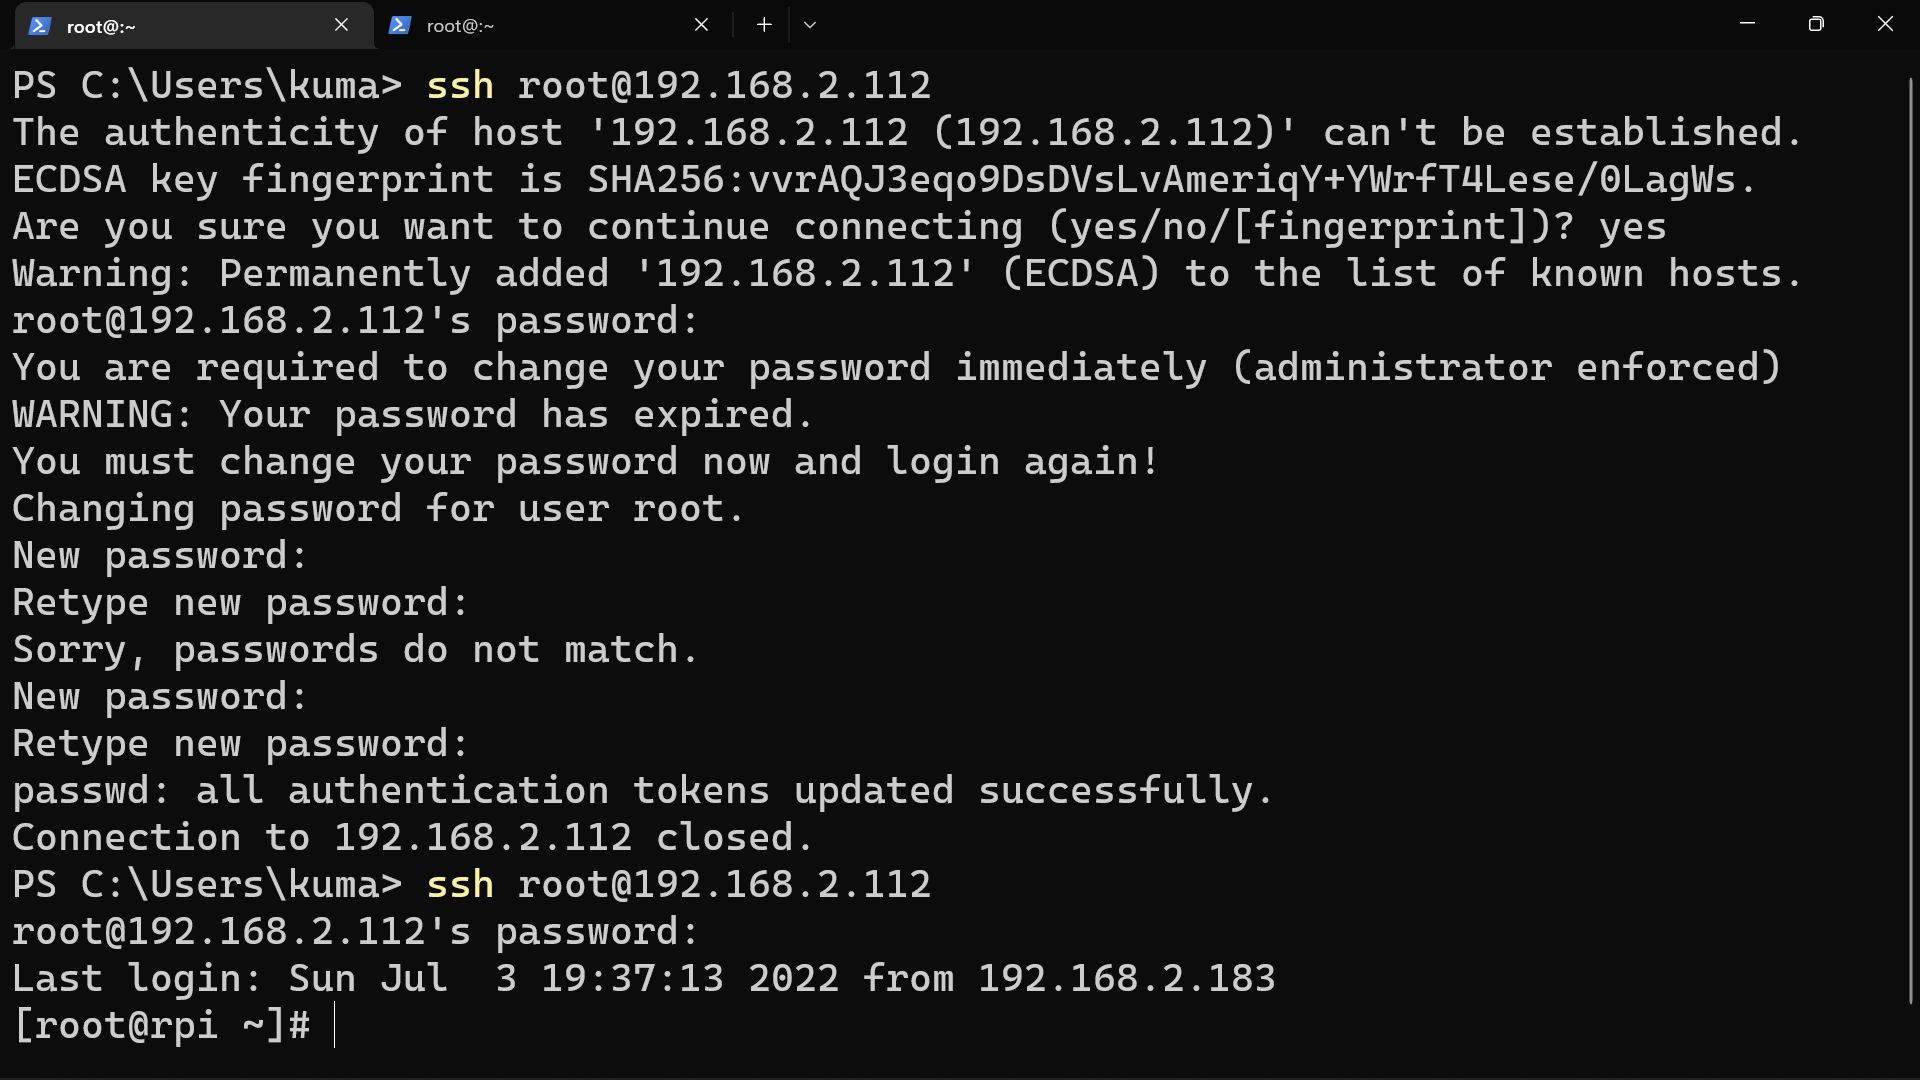
ssh 连上,用户名 root ,密码 oracle 。
系统准备
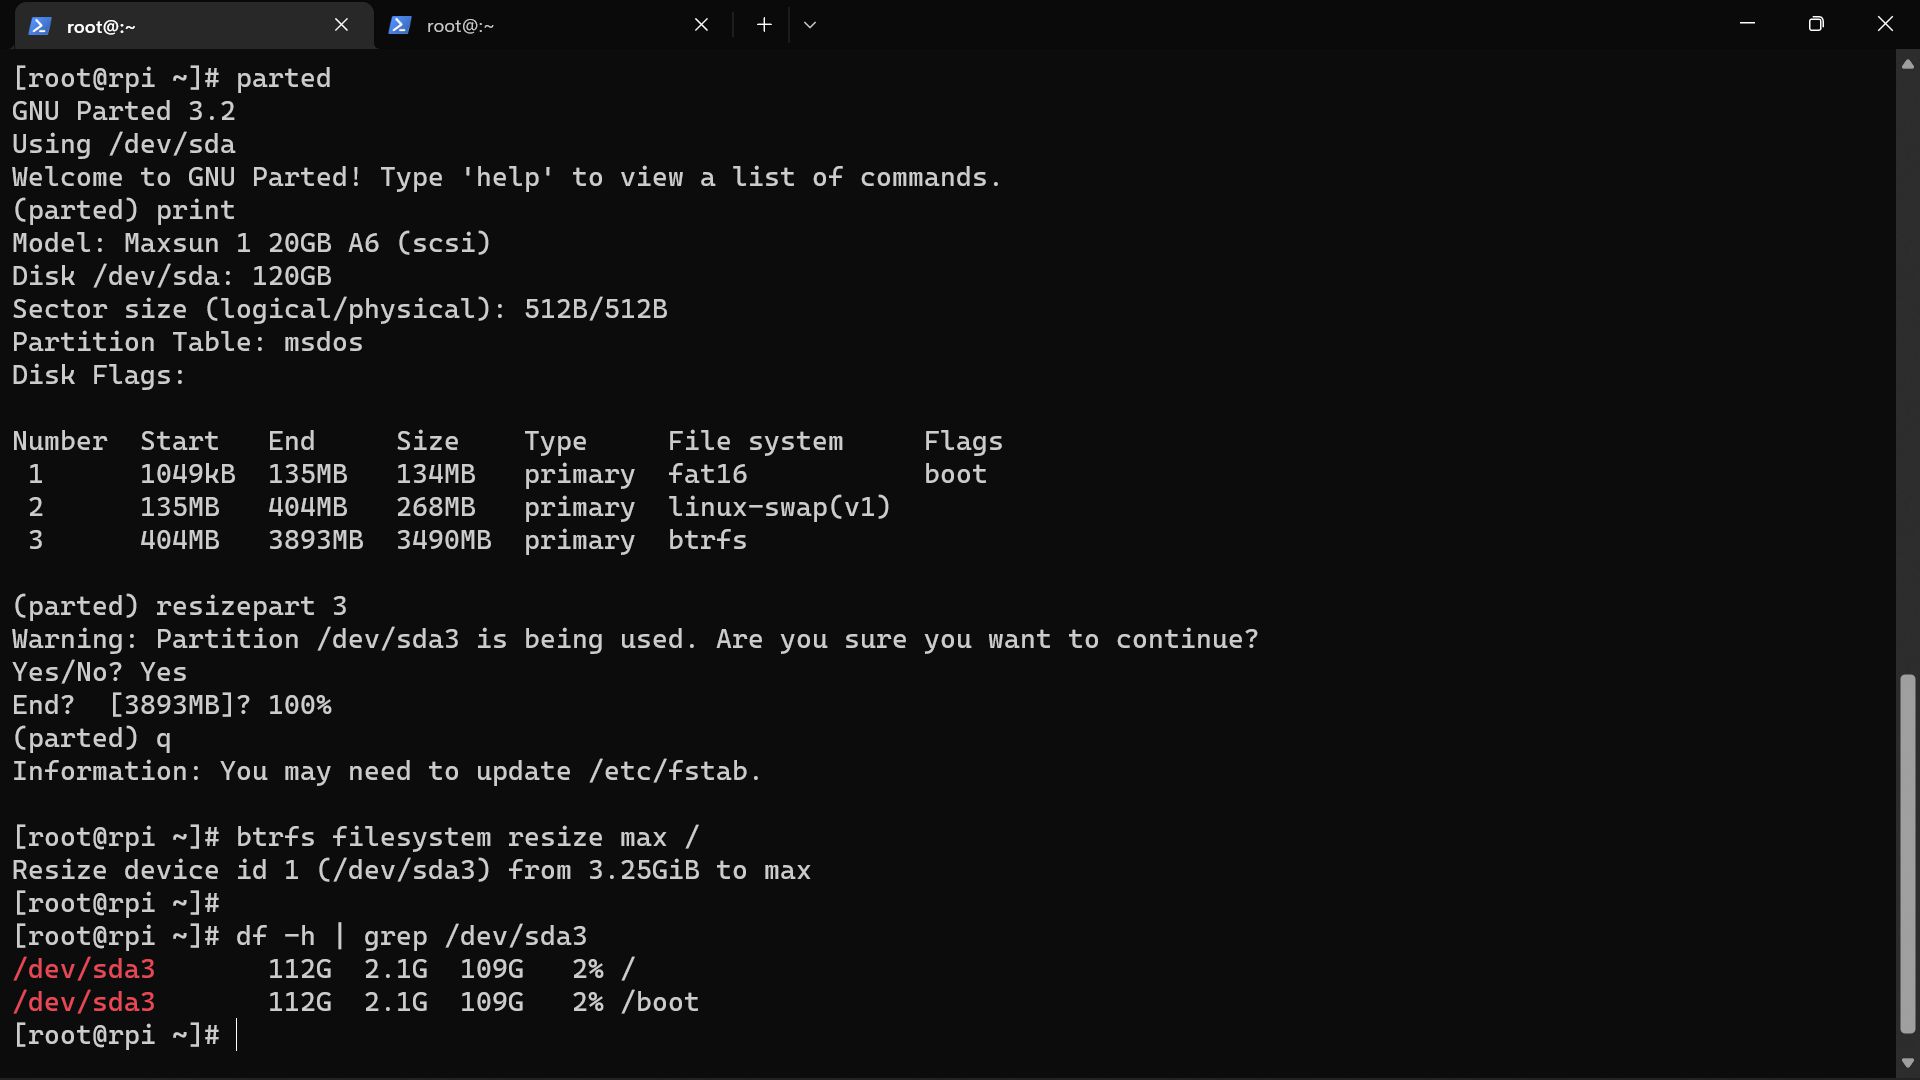
###扩展分区
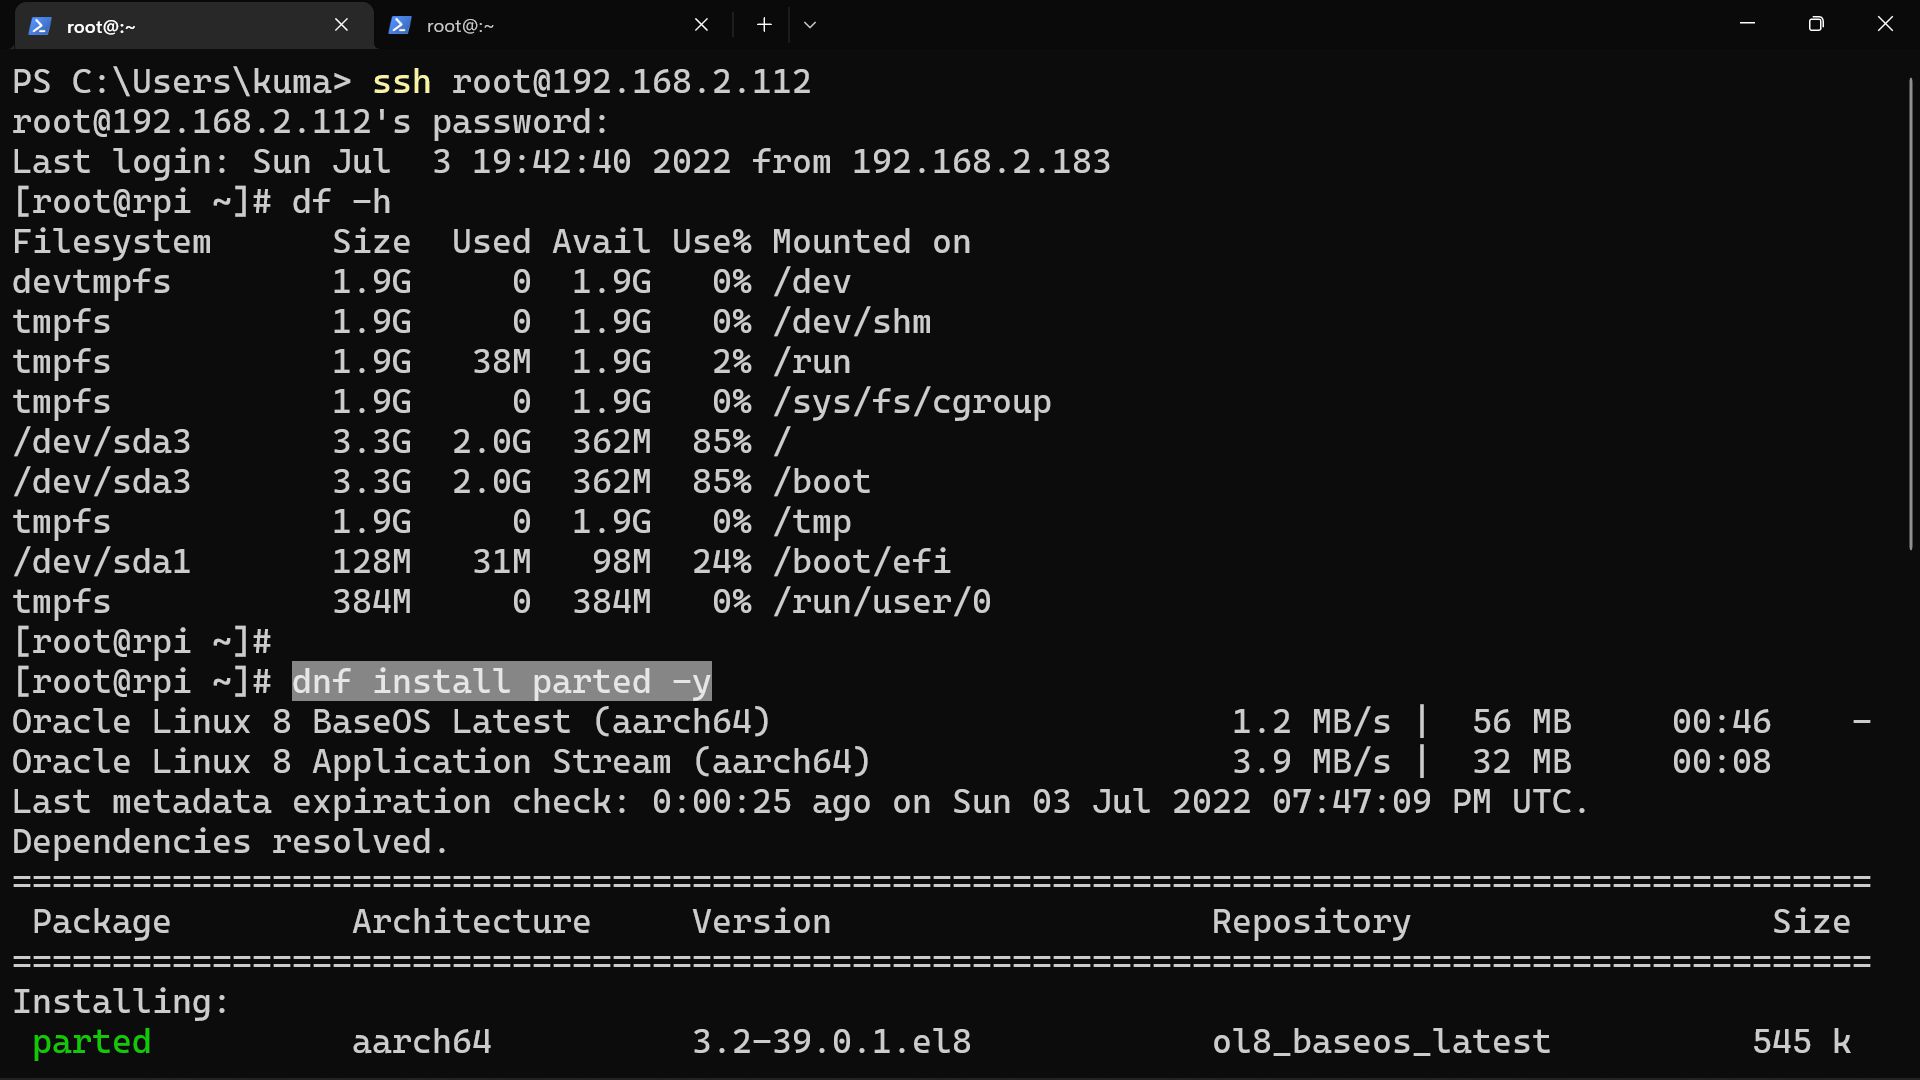
解压缩后的固件大小约为 3.89GB ,装完了剩下大约300MB。
这点地方塞牙缝 (dnf update) 都不够,先要用 parted 扩展分区。
没自带,先安装:
不用先dnf update
然后开搞:
1
2
3
4
5
6
| parted /dev/sda
# print
# resizepart 3
# q
btrfs filesystem resize max /
|
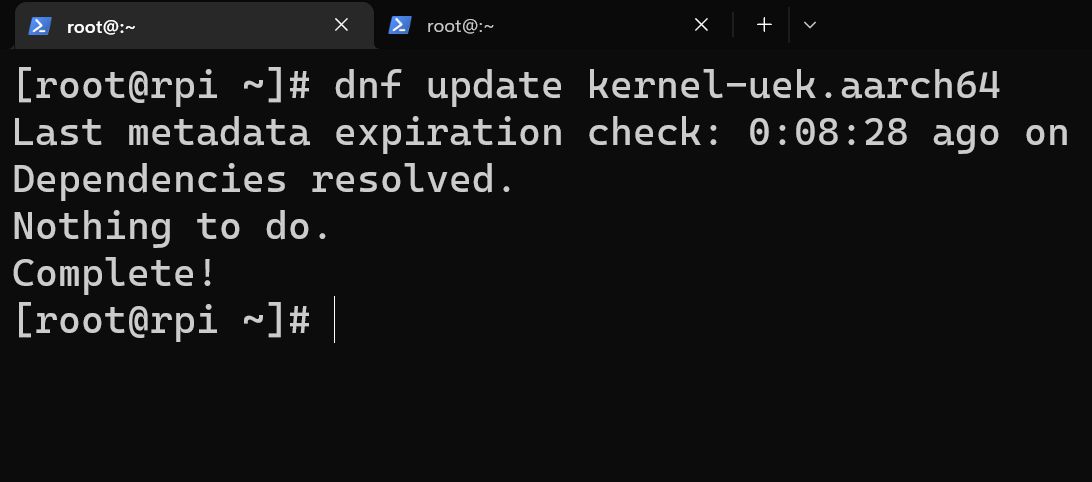
更新 kernel-uek
要留的唯一一个软件包是 kernel-uek 。
全称 Unbreakable Enterprise Kernel ,
是 Oracle 搞的 Linux 内核。
为什么留,因为只有 Oracle Linux 支持树莓派,当然只有它的内核能用。
1
| dnf update -y kernel-uek
|
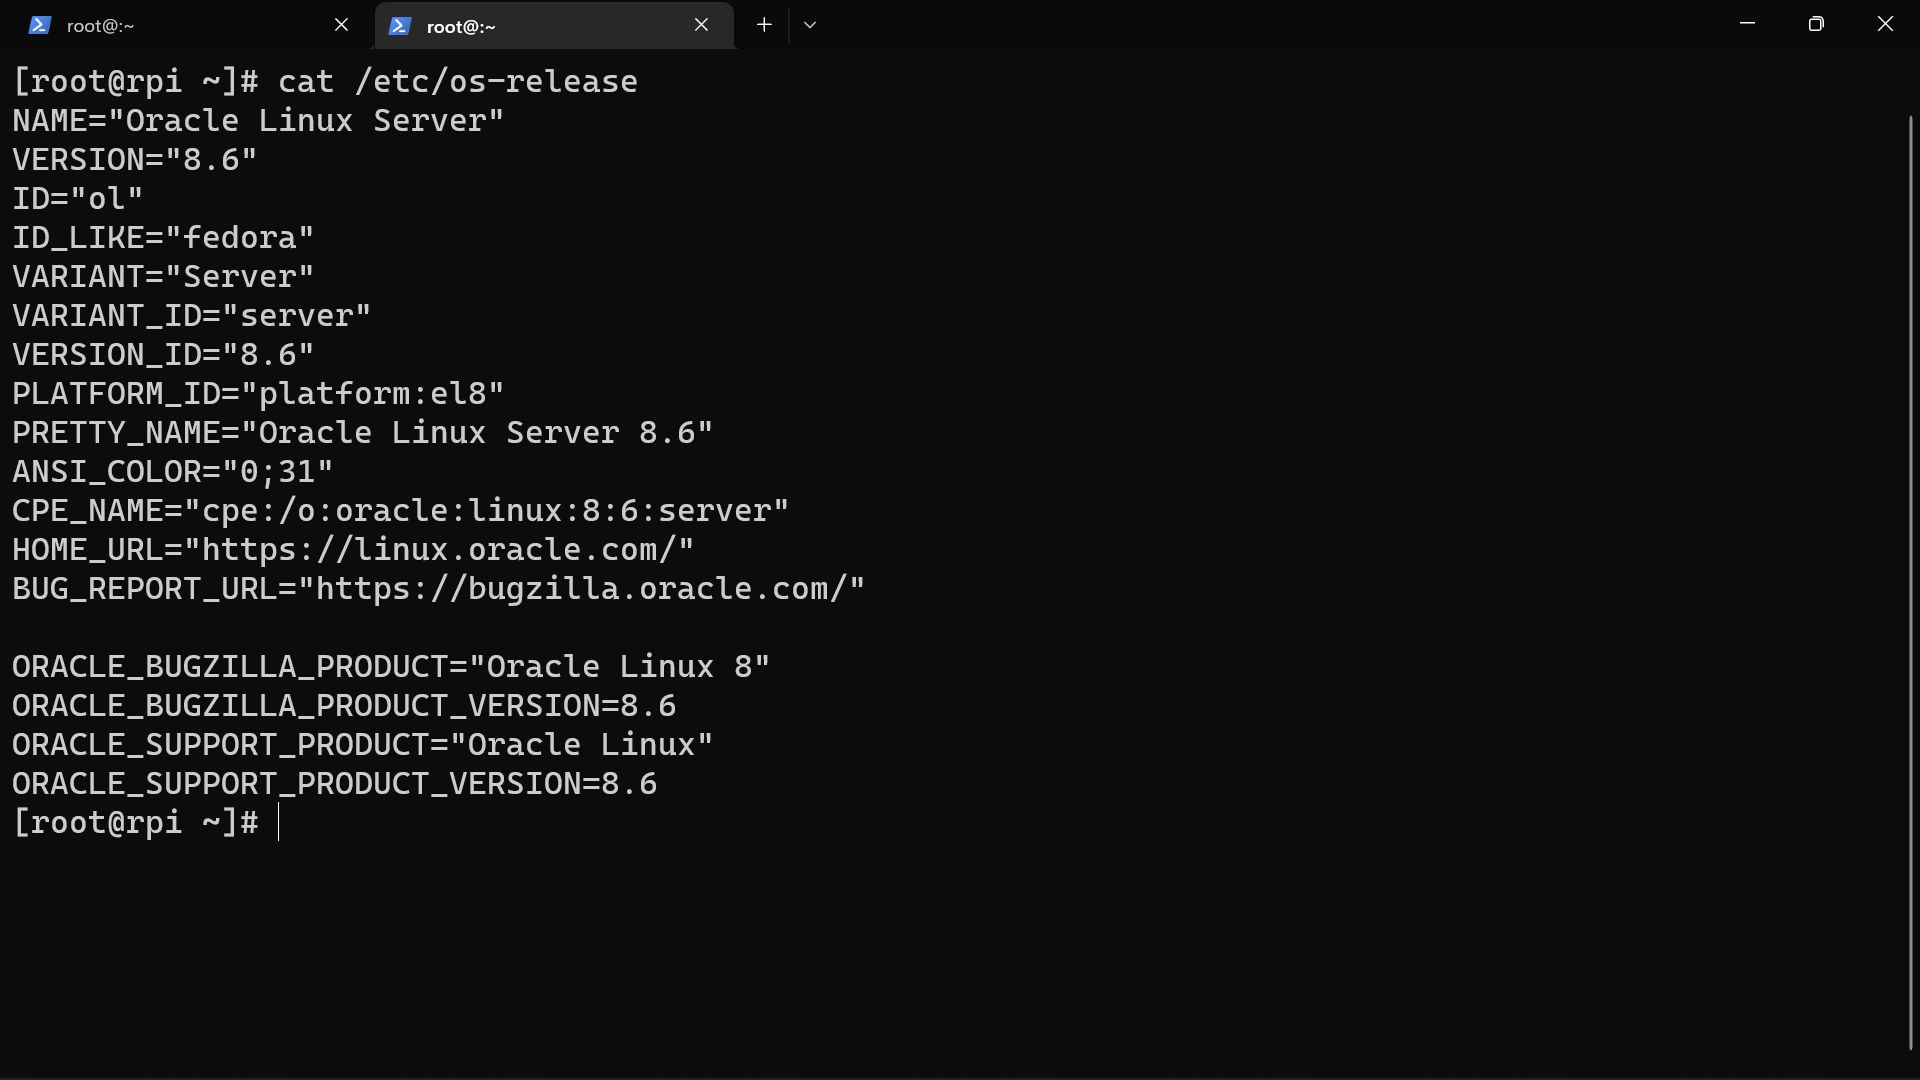
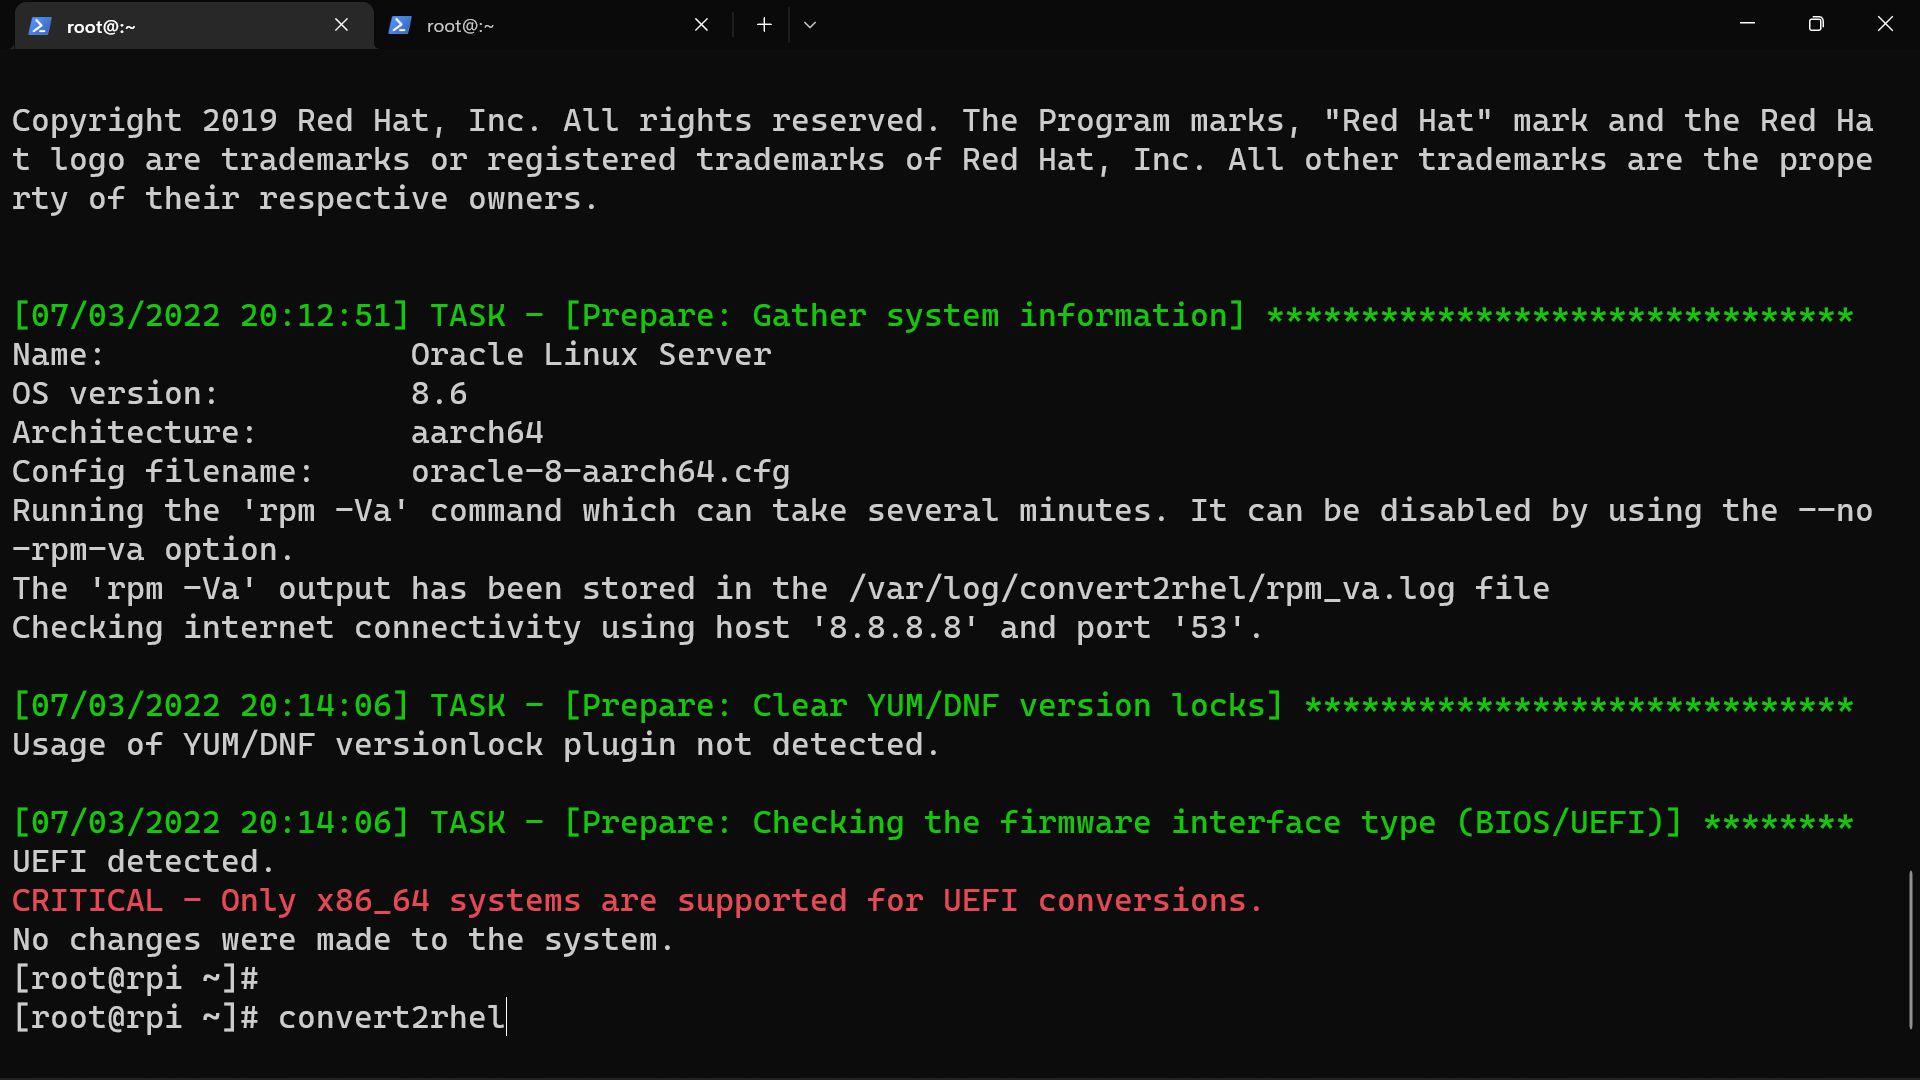
补丁和运行 “convert2rhel”。
开始偷梁换柱之前先看看 os-release 怀念一下:
###安装convert2rhel。
参照 换到 Red Hat 吧 ,
第一步是添加证书和仓库。
1
2
3
4
5
| # ref: https://www.redhat.com/en/blog/introduction-convert2rhel-now-officially-supported-convert-rhel-systems-rhel
curl -o /etc/pki/rpm-gpg/RPM-GPG-KEY-redhat-release https://www.redhat.com/security/data/fd431d51.txt
curl --create-dirs -o /etc/rhsm/ca/redhat-uep.pem https://ftp.redhat.com/redhat/convert2rhel/redhat-uep.pem
curl -o /etc/yum.repos.d/convert2rhel.repo https://ftp.redhat.com/redhat/convert2rhel/8/convert2rhel.repo
|
然后安装 convert2rhel :
1
| dnf install -y convert2rhel
|

修改配置
由于 RHEL 没有正式支持树莓派,它的转换工具也不会包含我们要用的配置。
硬转就会。。。
但是可以偷懒,只要改下 x86_64 的配置就行。
1
2
3
4
5
| cp /usr/share/convert2rhel/configs/oracle-8-x86_64.cfg /usr/share/convert2rhel/configs/oracle-8-aarch64.cfg
sed -i 's/rhel-8-for-x86_64/rhel-8-for-aarch64/g' /usr/share/convert2rhel/configs/oracle-8-aarch64.cfg
# sed -i 's/-rpms/-beta-rpms/g' /usr/share/convert2rhel/configs/oracle-8-aarch64.cfg
# sed -i "s/checks.perform_pre_checks()/loggerinst.task('SKIP CHECKS') # checks.perform_pre_checks()/g" /usr/lib/python3.6/site-packages/convert2rhel/main.py
sed -i 's/json-c.x86_64/json-c.aarch64/g' /usr/lib/python3.6/site-packages/convert2rhel/subscription.py
|
x86 上 convert2rhel 会搞定证书,
但是因为是树莓派,我们要自己搞。
红帽产品证书
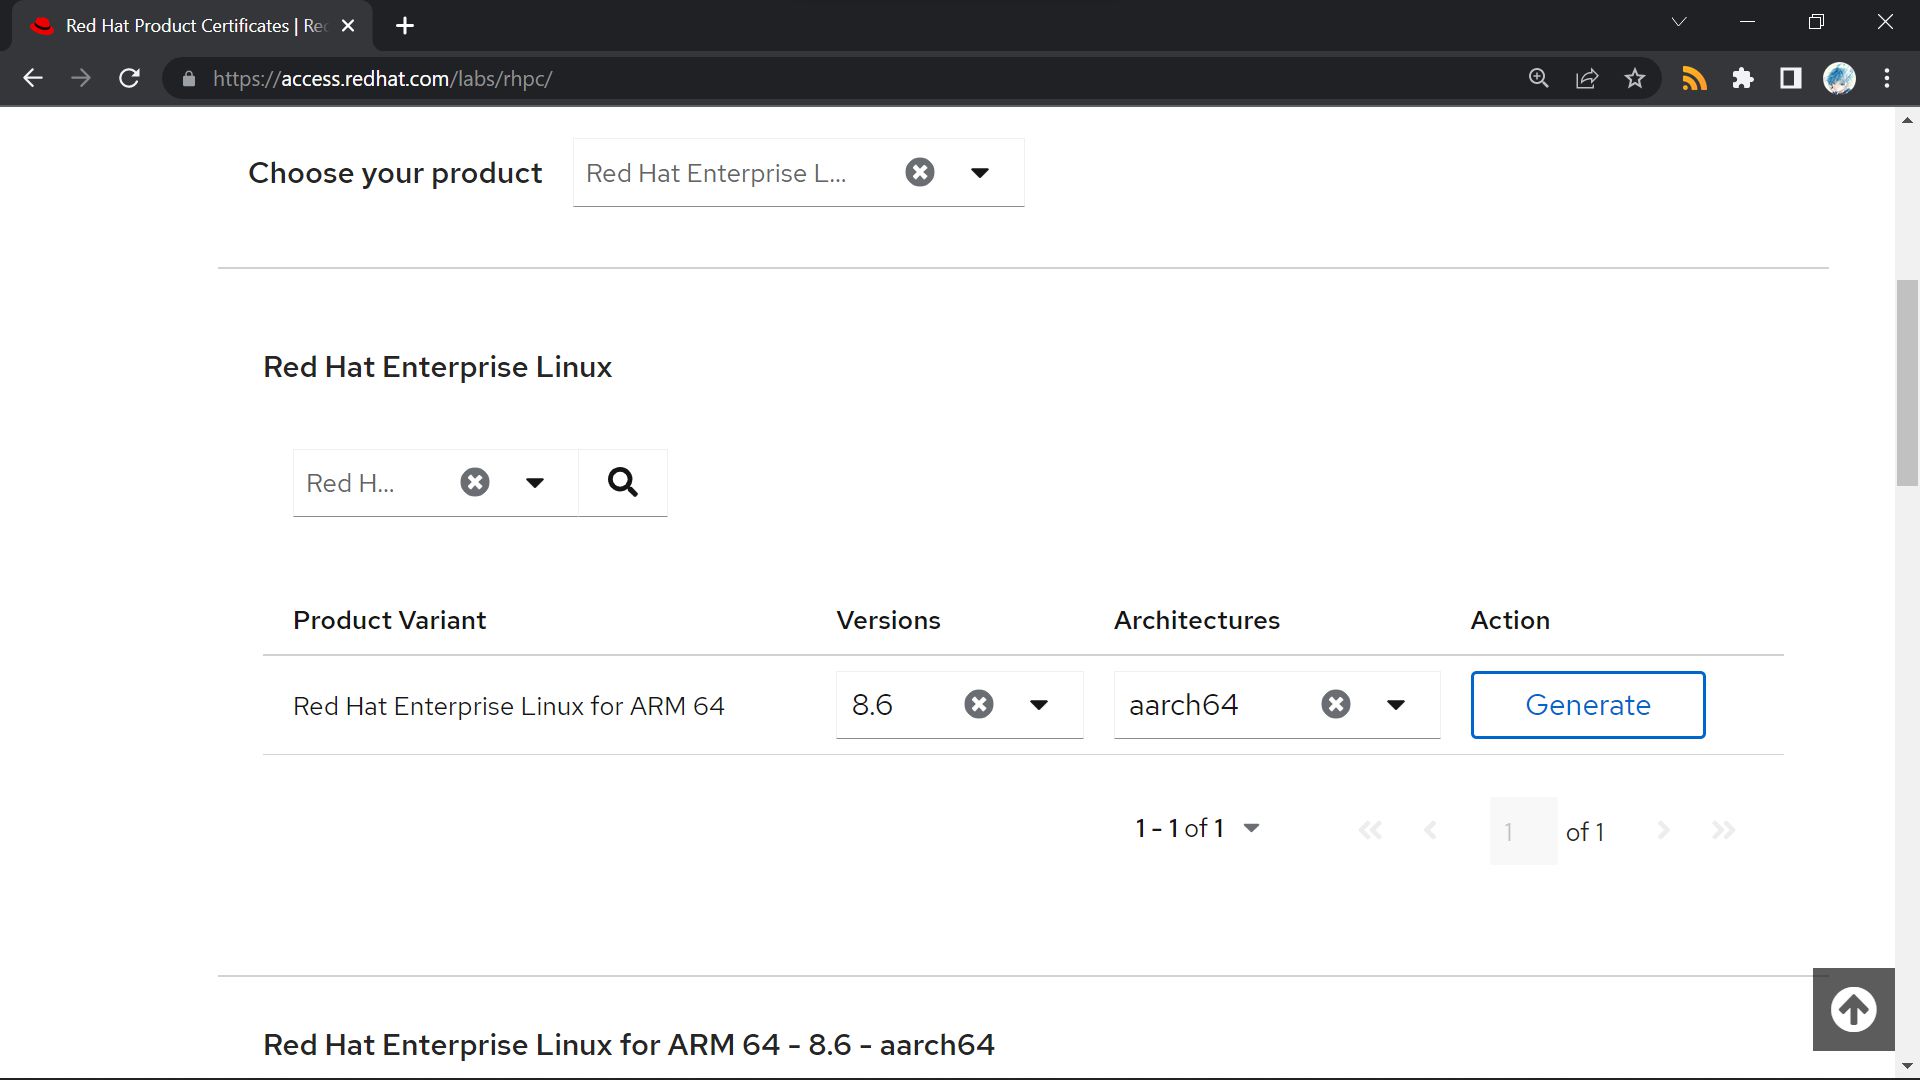
在 Choose your product 中选择 Red Hat Enterprise Linux,
找到 Red Hat Enterprise Linux for ARM 64,
选好版本和架构并下载,把证书传到树莓上运行。
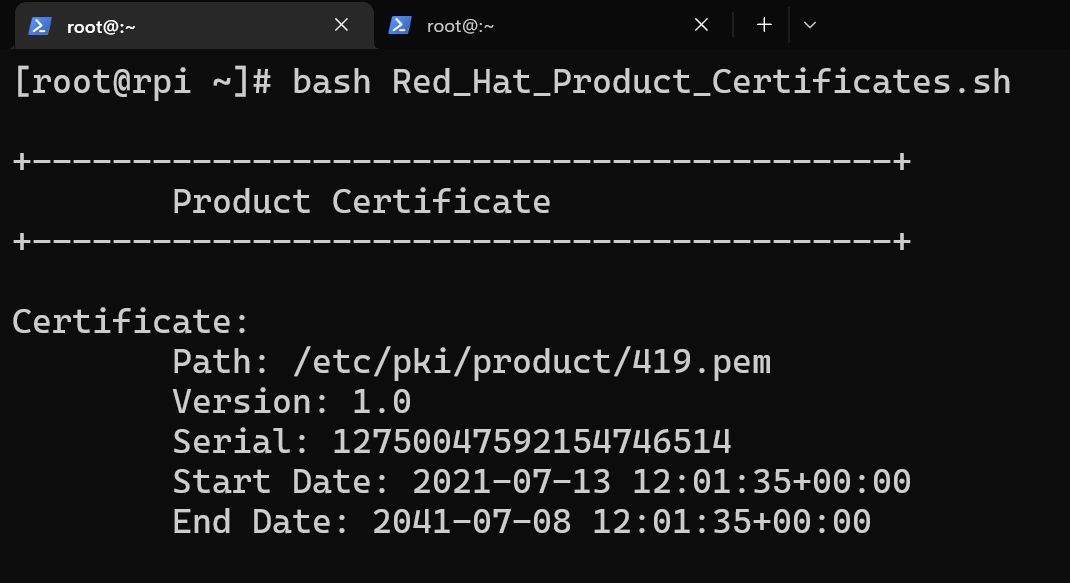
1
2
3
| # cp /path/to/cert/script /tmp/Red_Hat_Product_Certificate.sh
chmod +x /tmp/Red_Hat_Product_Certificate.sh
bash /tmp/Red_Hat_Product_Certificate.sh
|
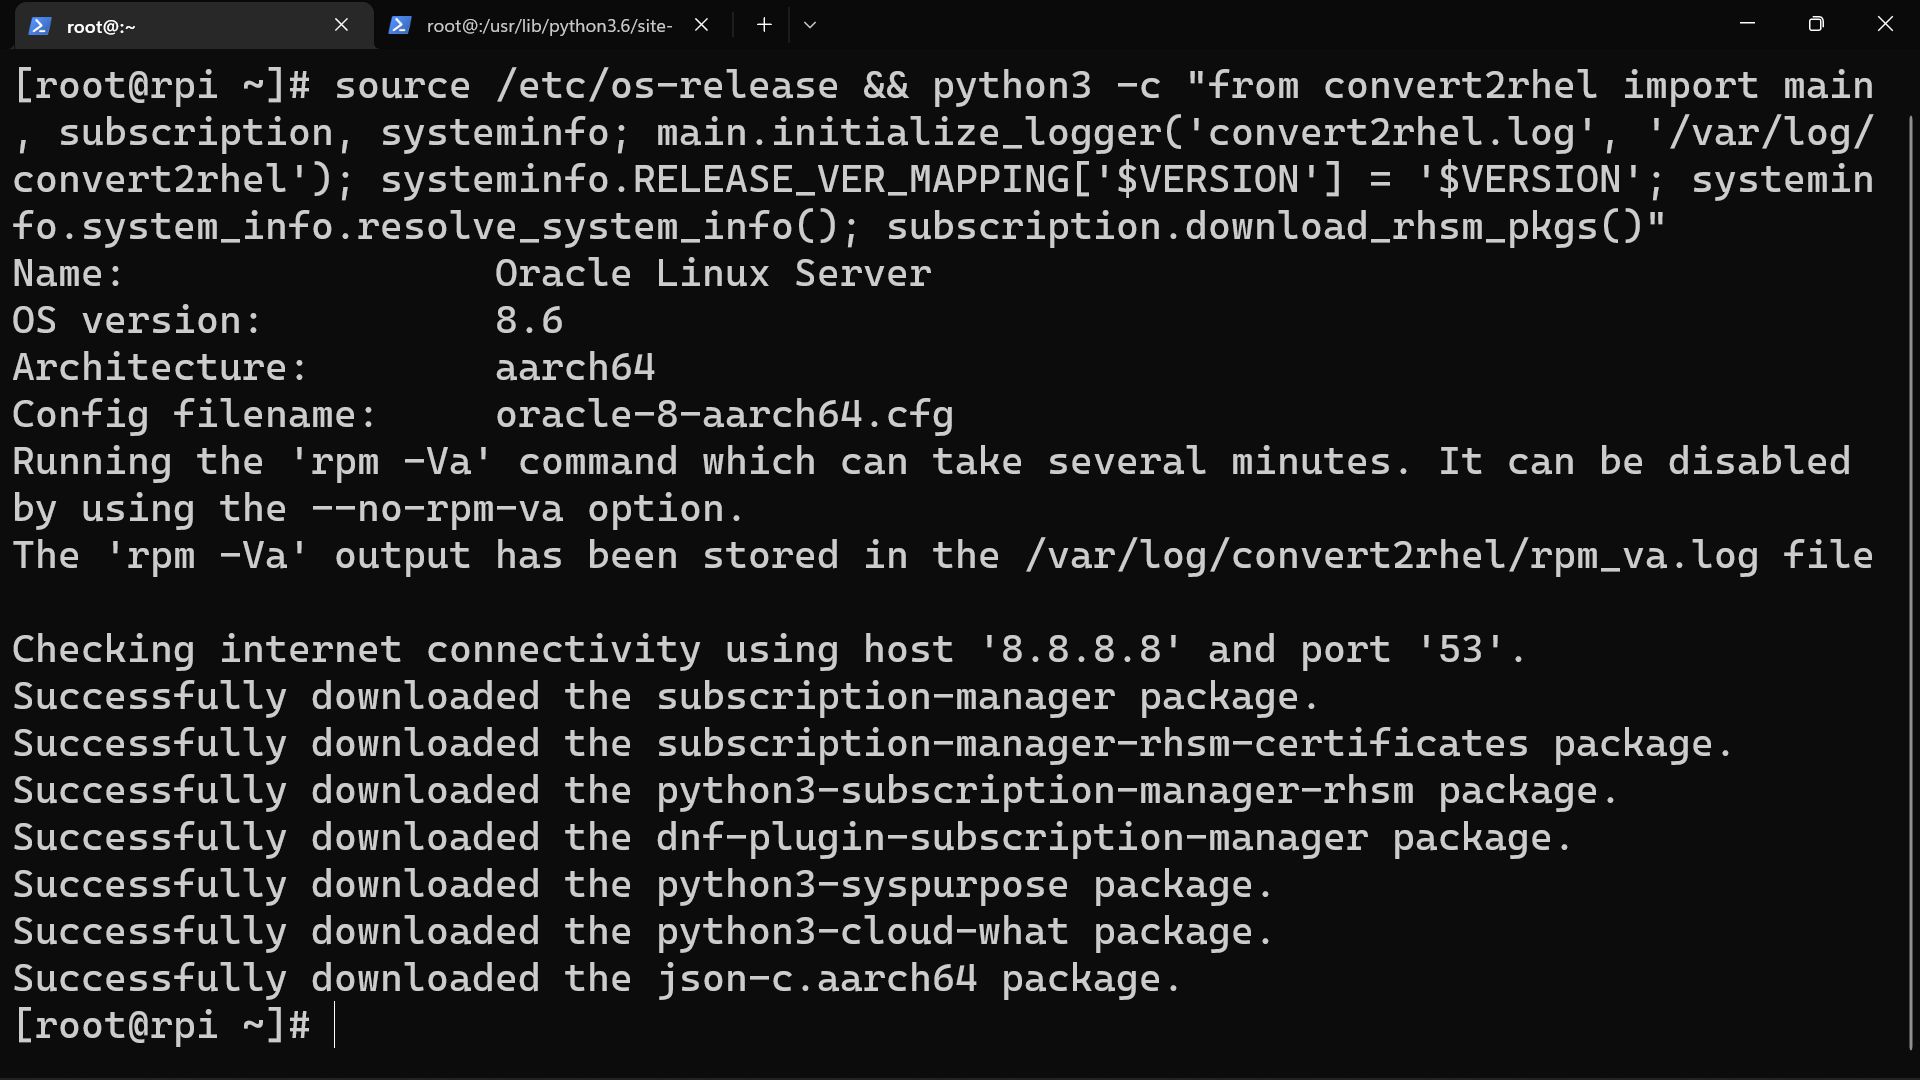
手动运行 convert2rhel
不能直接运行 convert2rhel ,
因为它写的时候也没想到会有人在树莓派上跑。
1
| source /etc/os-release && python3 -c "from convert2rhel import main, subscription, systeminfo; main.initialize_logger('convert2rhel.log', '/var/log/convert2rhel'); systeminfo.RELEASE_VER_MAPPING['$VERSION'] = '$VERSION'; systeminfo.system_info.resolve_system_info(); subscription.download_rhsm_pkgs()"
|
成功了大概会是这样:
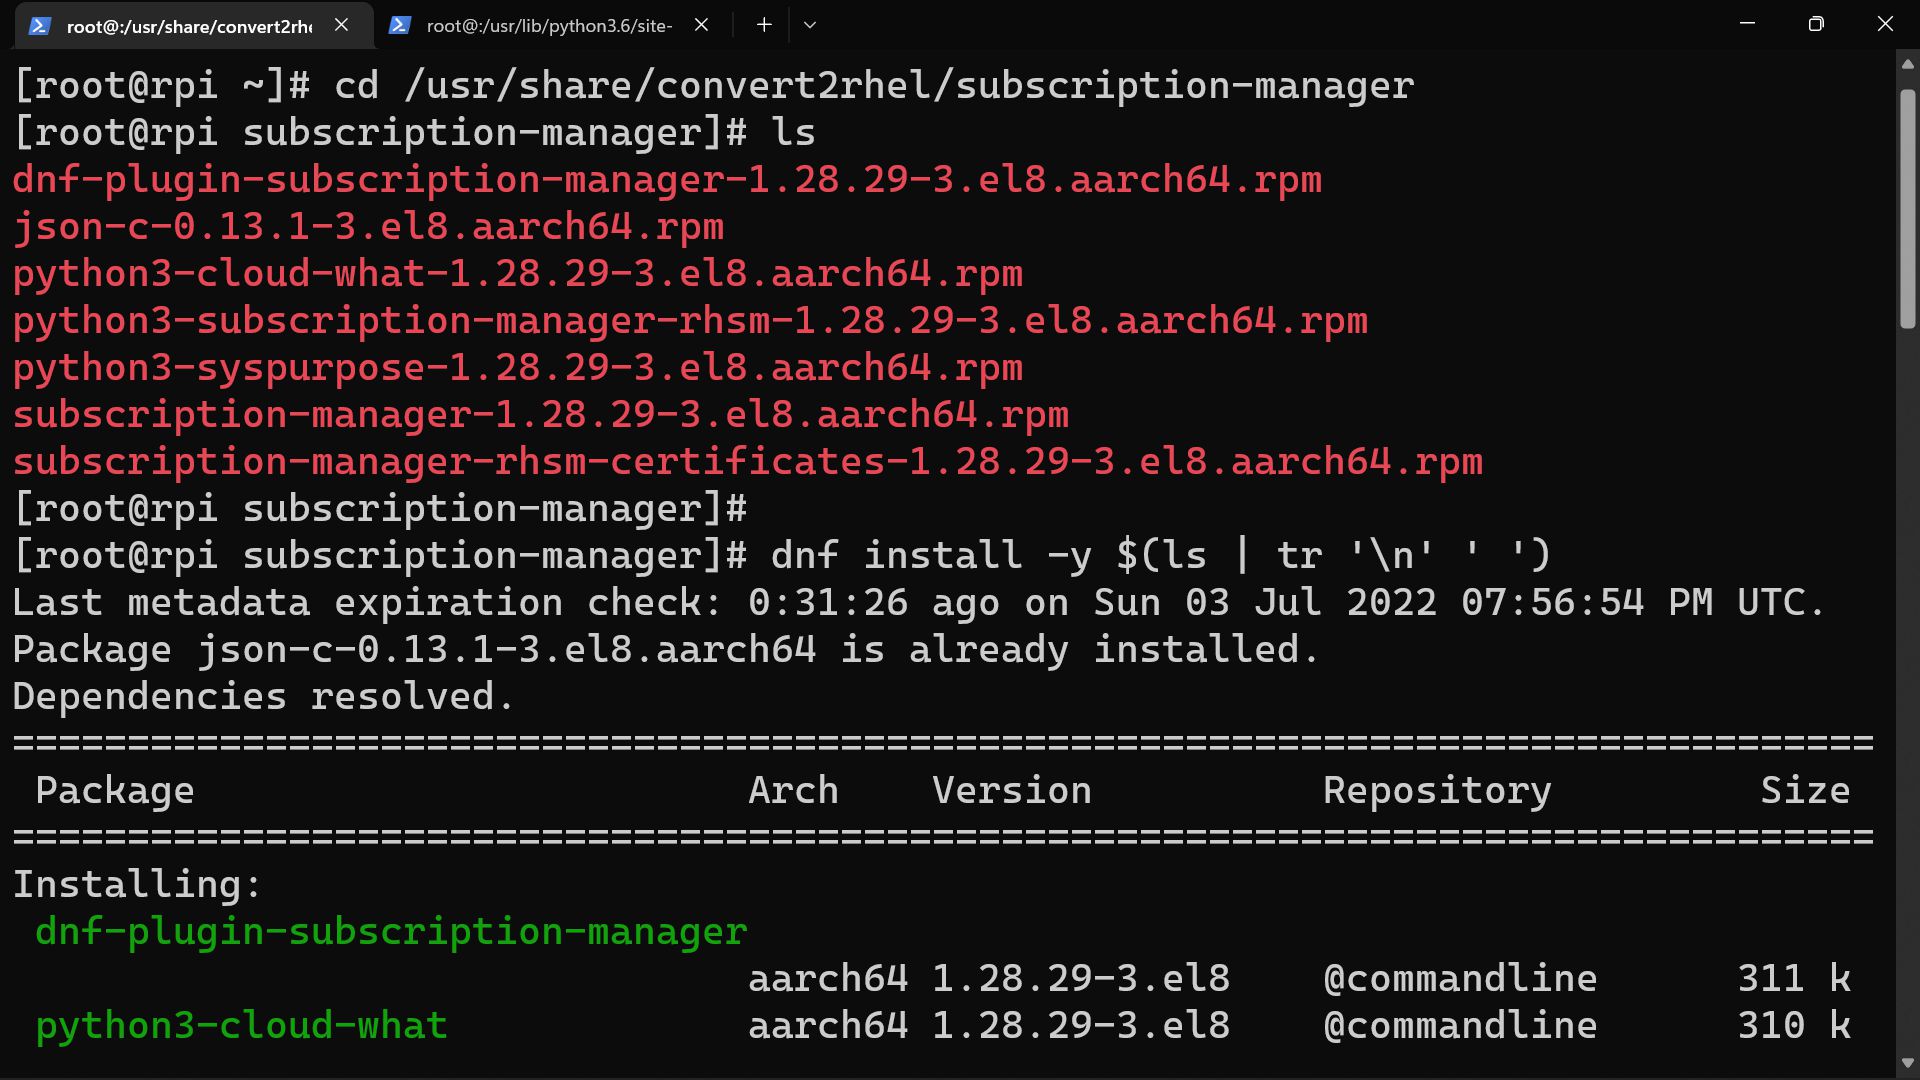
然后安装刚刚下载的软件包:
1
2
| cd /usr/share/convert2rhel/subscription-manager
dnf install -y $(ls | tr '\n' ' ')
|
绑定订阅
1
| subscription-manager register
|
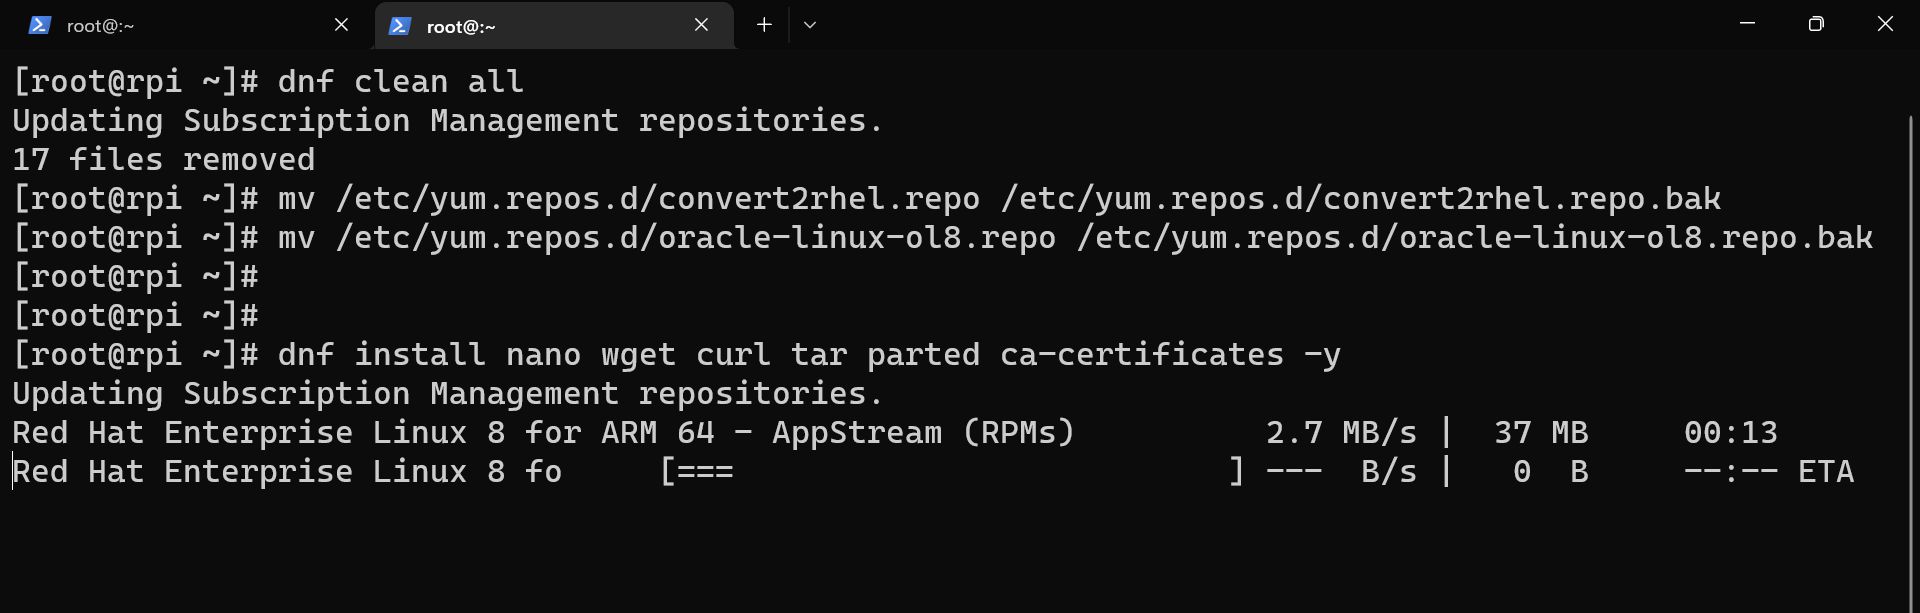
替换 repo
先鸟尽弓藏兔死狗烹。
1
2
3
| mv /etc/yum.repos.d/convert2rhel.repo /etc/yum.repos.d/convert2rhel.repo.bak
mv /etc/yum.repos.d/oracle-linux-ol8.repo /etc/yum.repos.d/oracle-linux-ol8.repo.bak
dnf clean all
|
删除不需要的软件包
1
2
3
4
| dnf install https://dl.fedoraproject.org/pub/epel/epel-release-latest-8.noarch.rpm
subscription-manager repos --enable "codeready-builder-for-rhel-8-$(arch)-rpms"
dnf remove convert2rhel -y
dnf remove oraclelinux-release oraclelinux-release-el8 || rpm -e --nodeps oraclelinux-release oraclelinux-release-el8
|
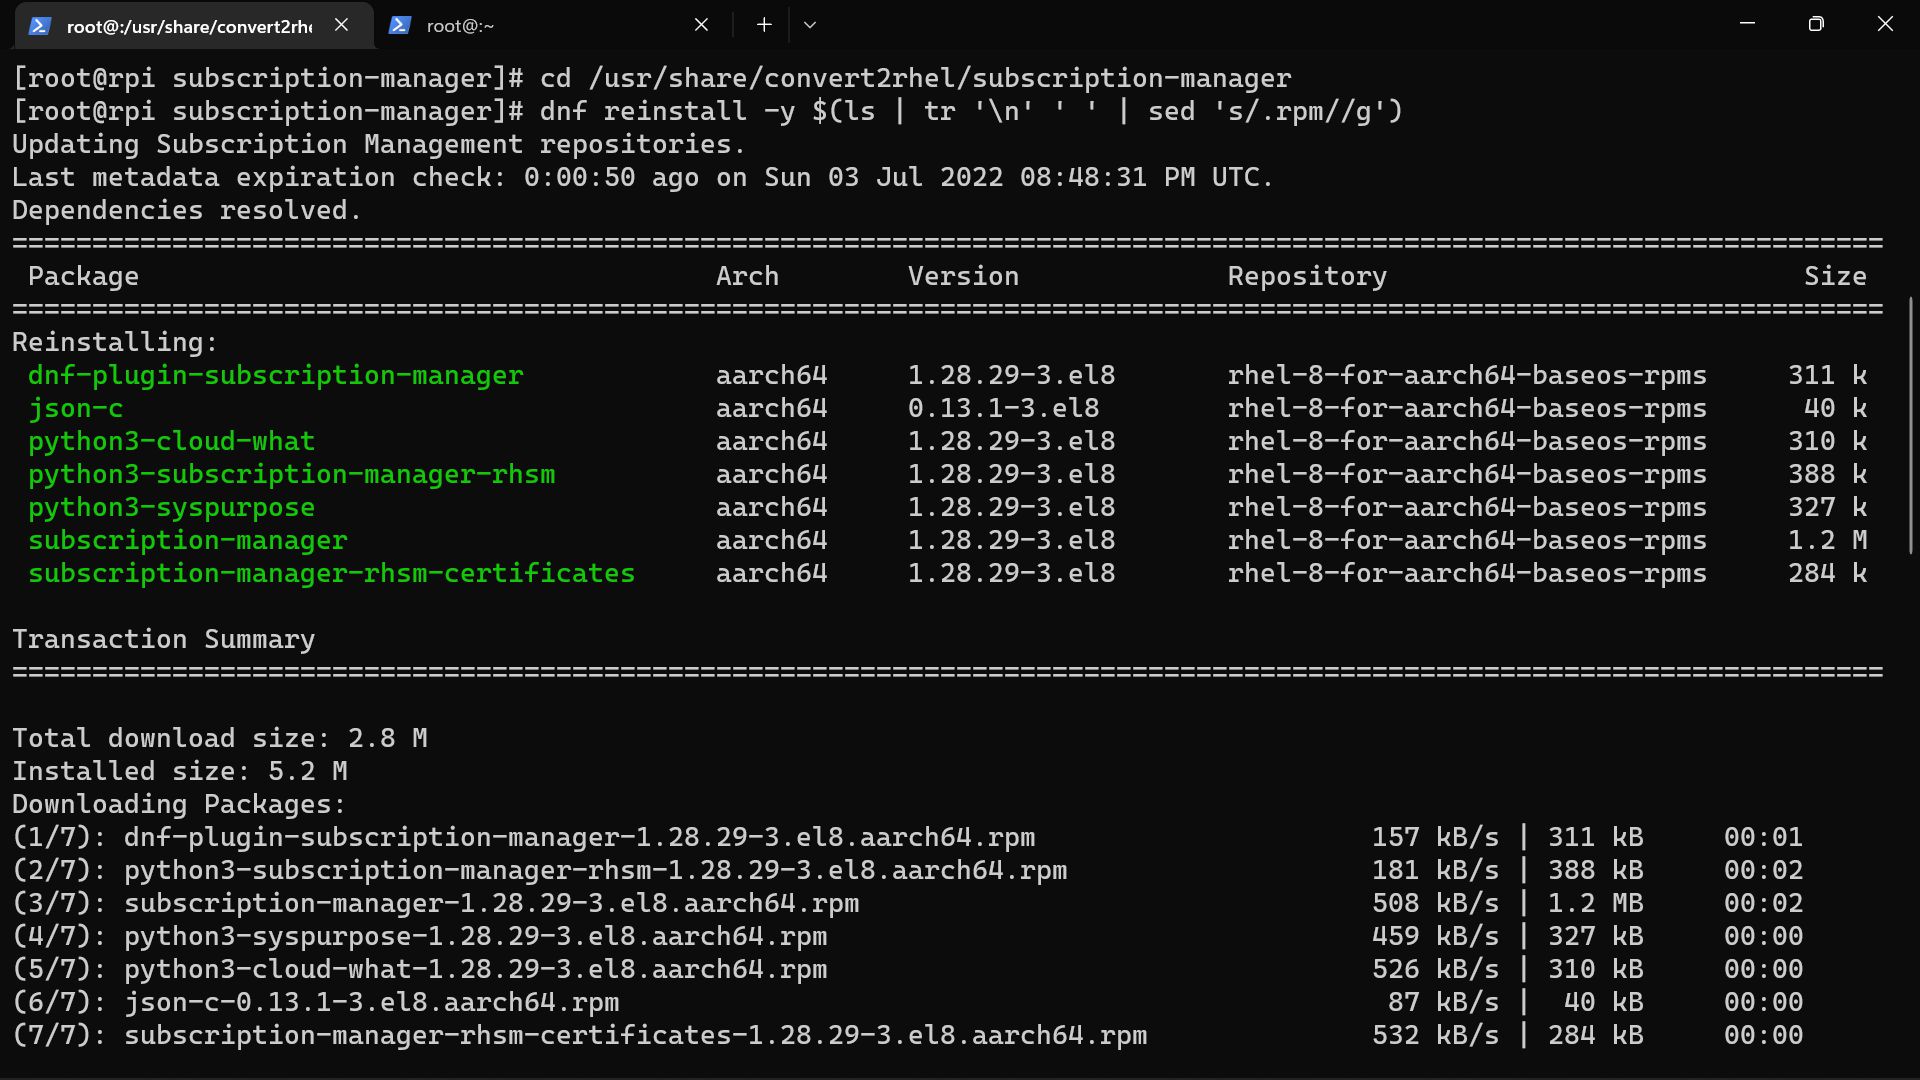
###重新安装本地安装的软件包
1
2
3
4
| cd /usr/share/convert2rhel/subscription-manager
dnf reinstall -y $(ls | tr '\n' ' ' | sed 's/.rpm//g')
cd ~
rm -rvf /usr/share/convert2rhel
|
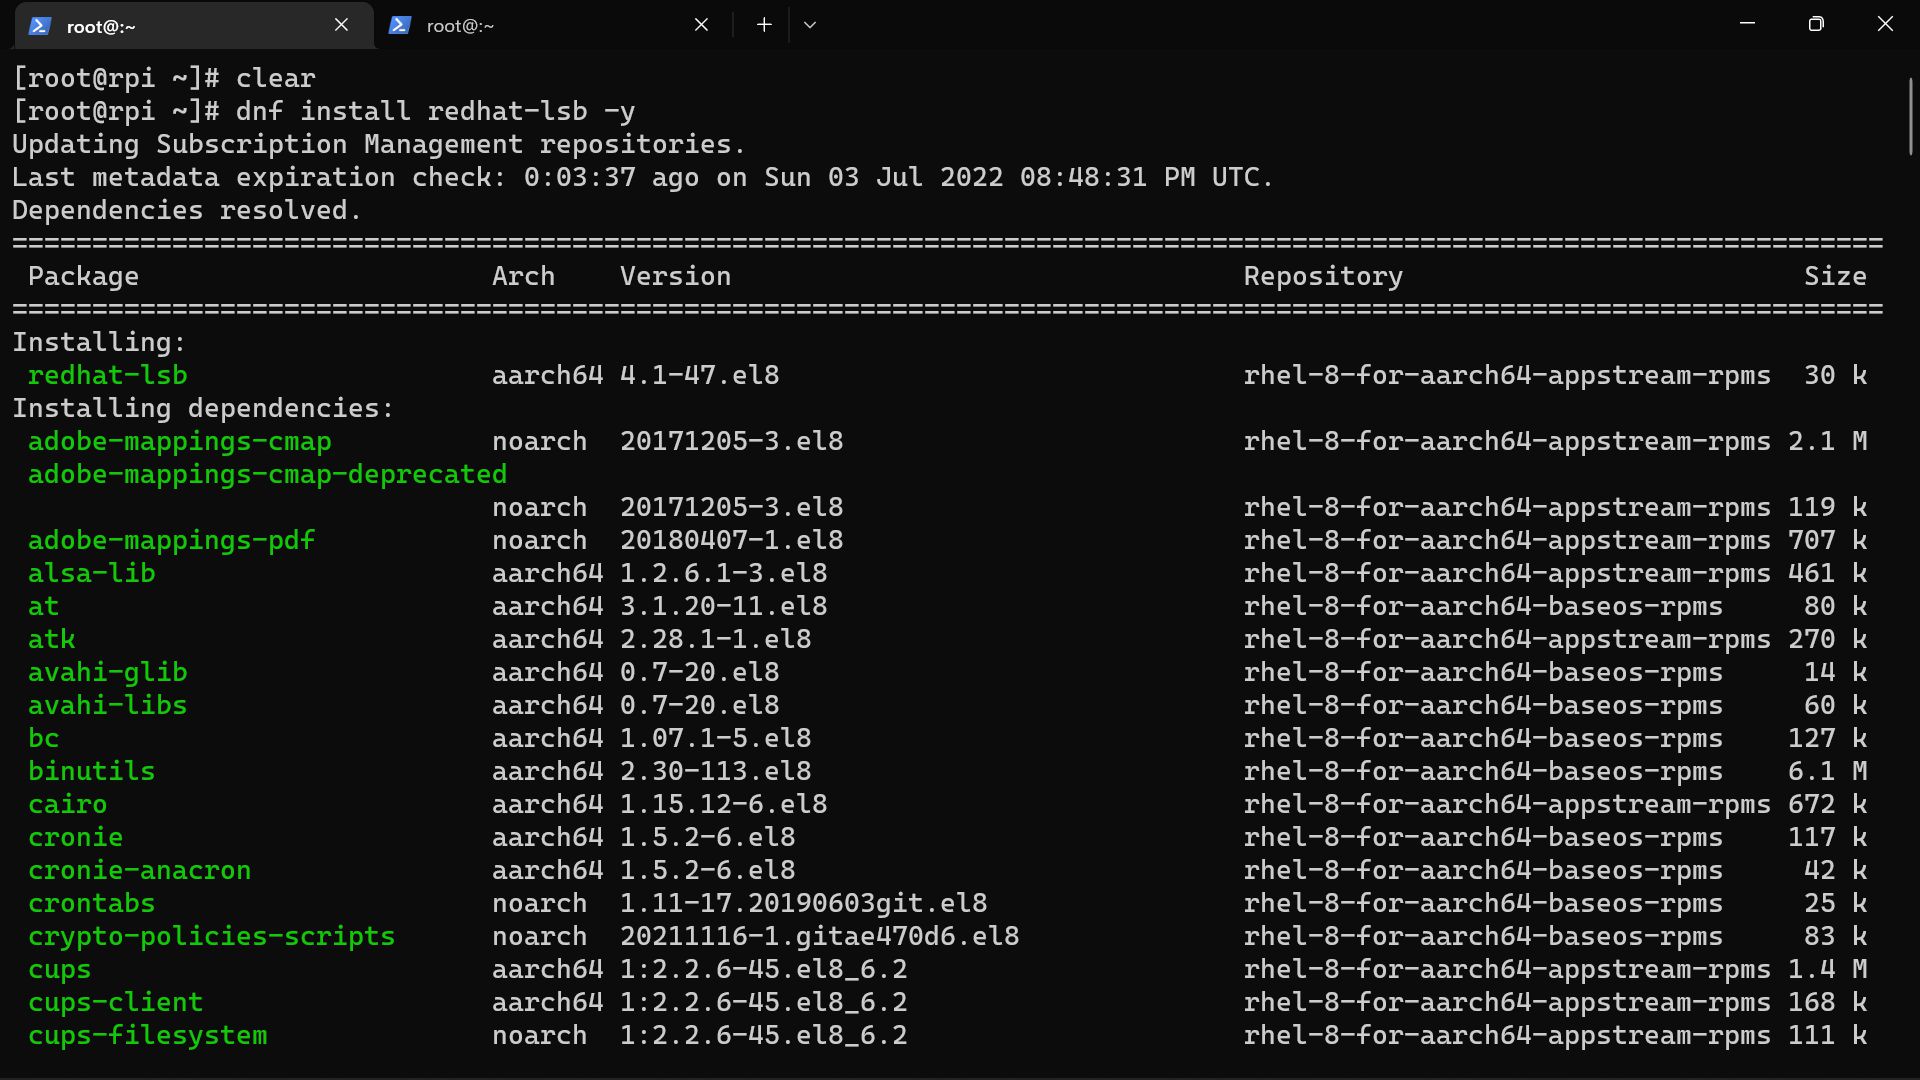
替换非 RHEL 软件包
1
| dnf install -y redhat-lsb
|
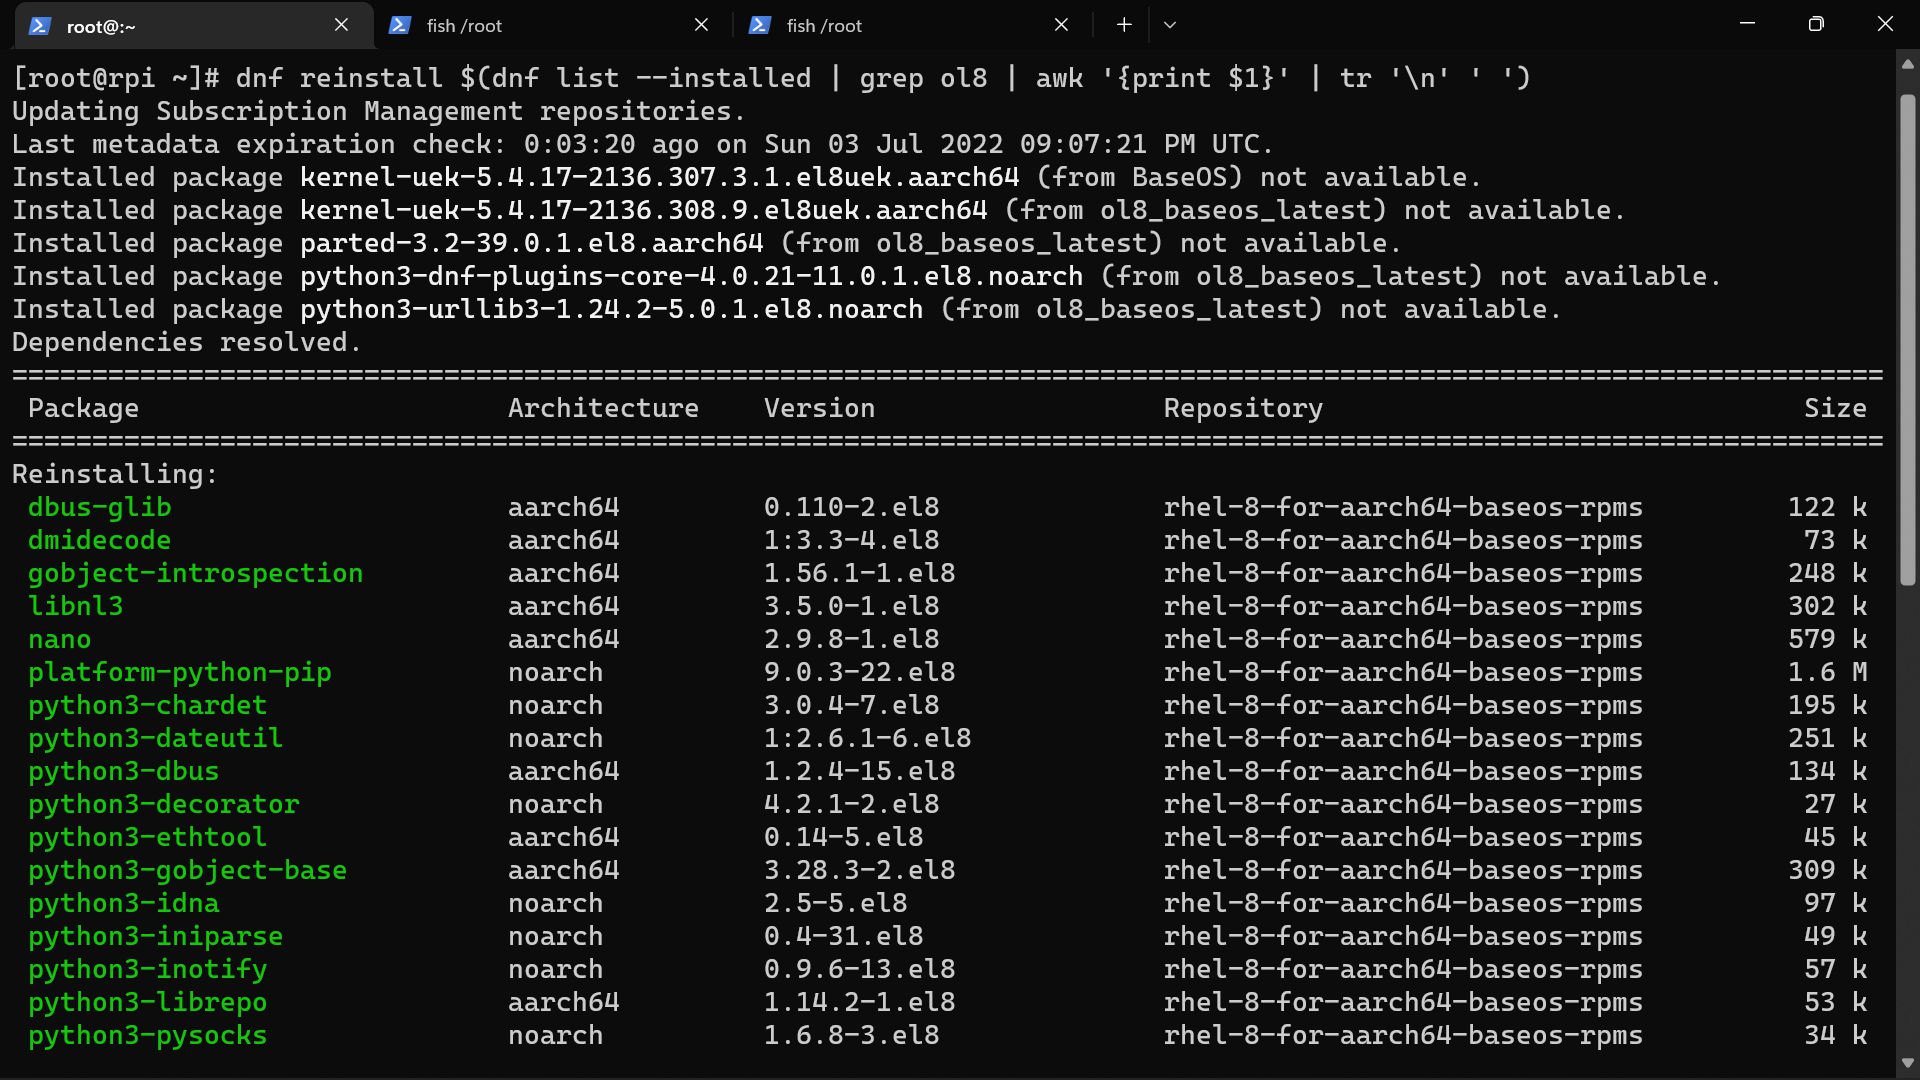
1
2
3
4
5
6
| dnf reinstall setup
dnf distro-sync
dnf update -y
dnf reinstall $(dnf list --installed | grep ol8 | awk '{print $1}' | tr '\n' ' ')
dnf reinstall $(dnf list --installed | grep anaconda | awk '{print $1}' | tr '\n' ' ')
dnf reinstall $(dnf list --installed | grep commandline | awk '{print $1}' | tr '\n' ' ')
|
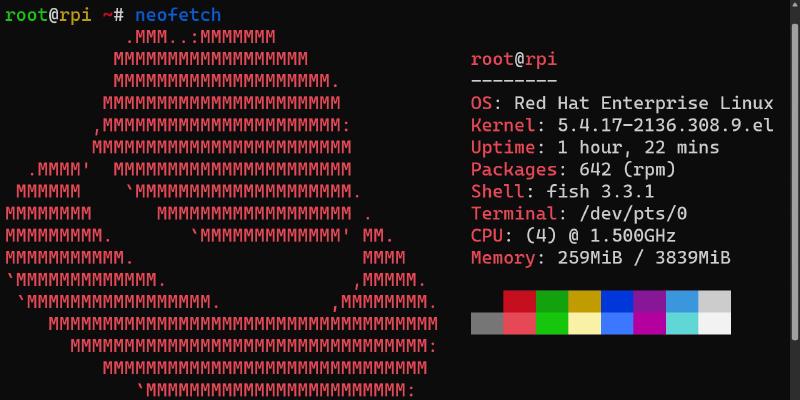
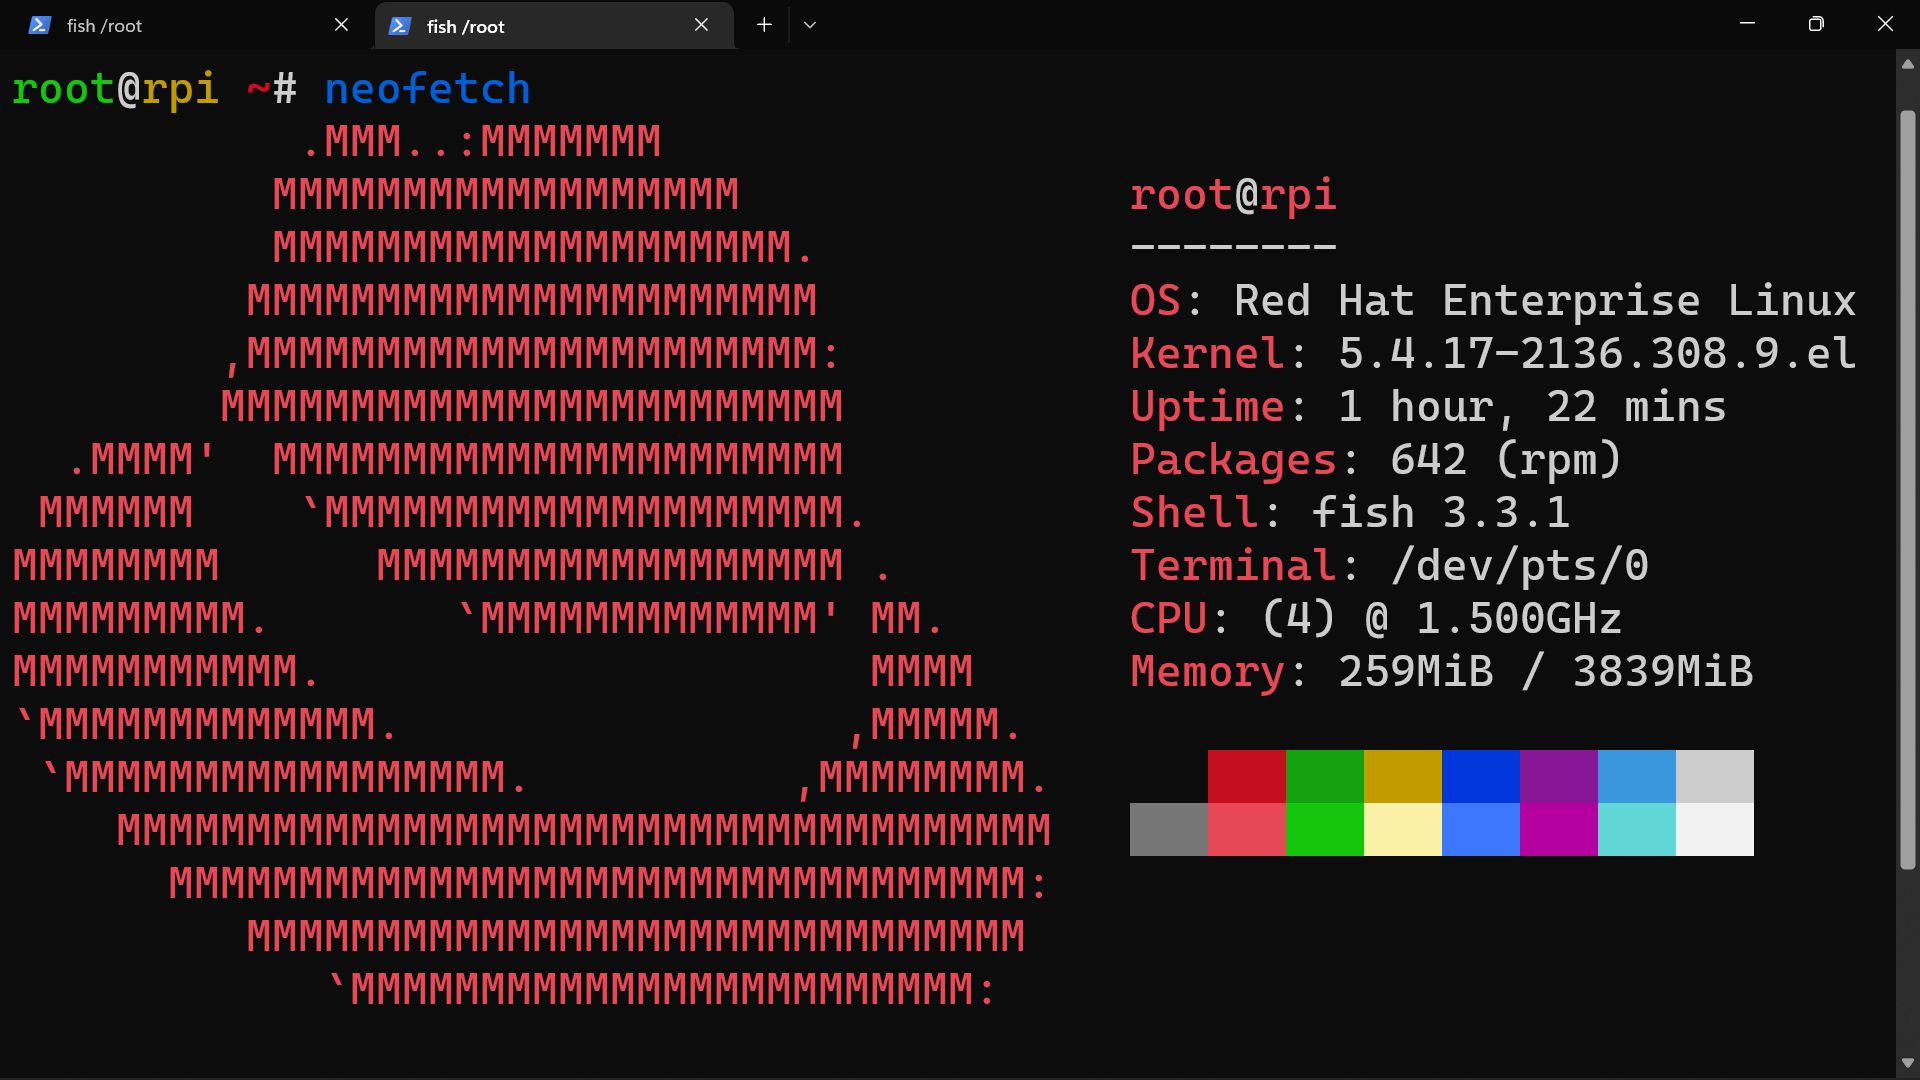
结论
家人们看看 neofetch 吧
后记
RHEL 9 出了,但是懒得折腾了,教程写了开摆。
不会真的有人会有和我一样的脑洞吧???
以及这篇尽量口语化了,如果你英语很彳亍,真想搞还是建议看看上面的英文链接。
虽然我英语是工地水平,但是大概还是比看这篇好理解一点。